Delegate installation overview
Install the default delegate
The inline tutorial below shows you how to install the default delegate for your Harness account. It can be either a Kubernetes delegate installed using a Helm chart, Terraform Helm Provider, and Kubernetes manifest or a Docker delegate using the docker run command. You can also review the tutorial directly here.
Install the default delegate on Kubernetes or Docker
Install Harness Delegate on Kubernetes or Docker
What is Harness Delegate?
Harness Delegate is a lightweight worker process that is installed on your infrastructure and communicates only via outbound HTTP/HTTPS to the Harness Platform. This enables the Harness Platform to leverage the delegate to execute the CI/CD and other tasks on your behalf, without any of your secrets leaving your network.
You can install the Harness Delegate on either Docker or Kubernetes.
Install Harness Delegate
Create a new delegate token
Log in to the Harness Platform and go to Account Settings -> Account Resources -> Delegates. Select the Tokens tab. Select +New Token, and enter a token name, for example firstdeltoken. Select Apply. Harness Platform generates a new token for you. Select Copy to copy and store the token in a temporary file. You will provide this token as an input parameter in the next installation step. The delegate will use this token to authenticate with the Harness Platform.
Get your Harness account ID
Along with the delegate token, you will also need to provide your Harness accountId as an input parameter during delegate installation. This accountId is present in every Harness URL. For example, in the following URL:
https://app.harness.io/ng/#/account/6_vVHzo9Qeu9fXvj-AcQCb/settings/overview
6_vVHzo9Qeu9fXvj-AcQCb is the accountId.
Now you are ready to install the delegate on either Docker or Kubernetes.
- Kubernetes
- Docker
Prerequisite
Ensure that you have access to a Kubernetes cluster. For the purposes of this tutorial, we will use minikube.
Install minikube
- On Windows:
choco install minikube
- On macOS:
brew install minikube
Now start minikube with the following config.
minikube start --memory 4g --cpus 4
Validate that you have kubectl access to your cluster.
kubectl get pods -A
Now that you have access to a Kubernetes cluster, you can install the delegate using any of the options below.
- Helm Chart
- Terraform Helm Provider
- Kubernetes Manifest
Install the Helm chart
As a prerequisite, you must have Helm v3 installed on the machine from which you connect to your Kubernetes cluster.
You can now install the delegate using the delegate Helm chart. First, add the harness-delegate Helm chart repo to your local Helm registry.
helm repo add harness-delegate https://app.harness.io/storage/harness-download/delegate-helm-chart/
helm repo update
helm search repo harness-delegate
You can see that there are two Helm charts available. We will use the harness-delegate/harness-delegate-ng chart in this tutorial.
NAME                                    CHART VERSION   APP VERSION DESCRIPTION
harness-delegate/harness-delegate-ng    1.0.8           1.16.0      A Helm chart for deploying harness-delegate
Now we are ready to install the delegate. The following command installs/upgrades firstk8sdel delegate (which is a Kubernetes workload) in the harness-delegate-ng namespace using the harness-delegate/harness-delegate-ng Helm chart.
helm upgrade -i firstk8sdel --namespace harness-delegate-ng --create-namespace \
  harness-delegate/harness-delegate-ng \
  --set delegateName=firstk8sdel \
  --set accountId=PUT_YOUR_HARNESS_ACCOUNTID_HERE \
  --set delegateToken=PUT_YOUR_DELEGATE_TOKEN_HERE \
  --set managerEndpoint=PUT_YOUR_MANAGER_HOST_AND_PORT_HERE \
  --set delegateDockerImage=harness/delegate:23.02.78306 \
  --set replicas=1 --set upgrader.enabled=false
The above command uses the default values.yaml located in the delegate-helm-chart GitHub repo. If you want change one or more values in a persistent manner instead of the command line, you can download and update the values.yaml file as per your need. You can use the updated values.yaml file as shown below.
helm upgrade -i firstk8sdel --namespace harness-delegate-ng --create-namespace \
  harness-delegate/harness-delegate-ng \
  -f values.yaml \
  --set delegateName=firstk8sdel \
  --set accountId=PUT_YOUR_HARNESS_ACCOUNTID_HERE \
  --set delegateToken=PUT_YOUR_DELEGATE_TOKEN_HERE \
  --set managerEndpoint=PUT_YOUR_MANAGER_HOST_AND_PORT_HERE \
  --set delegateDockerImage=harness/delegate:23.02.78306 \
  --set replicas=1 --set upgrader.enabled=false
Replace the PUT_YOUR_MANAGER_HOST_AND_PORT_HERE variable with the Harness Manager Endpoint noted below. For Harness SaaS accounts, you can find your Harness Cluster Location on the Account Overview page under the Account Settings section of the left navigation. For Harness CDCE, the endpoint varies based on the Docker vs. Helm installation options.
| Harness Cluster Location | Harness Manager Endpoint on Harness Cluster |
|---|---|
| SaaS prod-1 | https://app.harness.io |
| SaaS prod-2 | https://app.harness.io/gratis |
| SaaS prod-3 | https://app3.harness.io |
| CDCE Docker | http://<HARNESS_HOST> if Docker Delegate is remote to CDCE or http://host.docker.internal if Docker Delegate is on same host as CDCE |
| CDCE Helm | http://<HARNESS_HOST>:7143 where HARNESS_HOST is the public IP of the Kubernetes node where CDCE Helm is running |
Create main.tf file
Harness uses a Terraform module for the Kubernetes delegate. This module uses the standard Terraform Helm provider to install the Helm chart onto a Kubernetes cluster whose config by default is stored in the same machine at the ~/.kube/config path. Copy the following into a main.tf file stored on a machine from which you want to install your delegate.
module "delegate" {
  source = "harness/harness-delegate/kubernetes"
  version = "0.1.5"

  account_id = "PUT_YOUR_HARNESS_ACCOUNTID_HERE"
  delegate_token = "PUT_YOUR_DELEGATE_TOKEN_HERE"
  delegate_name = "firstk8sdel"
  namespace = "harness-delegate-ng"
  manager_endpoint = "PUT_YOUR_MANAGER_HOST_AND_PORT_HERE"
  delegate_image = "harness/delegate:23.02.78306"
  replicas = 1
  upgrader_enabled = false

  # Additional optional values to pass to the helm chart
  values = yamlencode({
    javaOpts: "-Xms64M"
  })
}

provider "helm" {
  kubernetes {
    config_path = "~/.kube/config"
  }
}
Now replace the variables in the file with your Harness accound ID and delegate token values. Replace PUT_YOUR_MANAGER_HOST_AND_PORT_HERE with the Harness Manager Endpoint noted below. For Harness SaaS accounts, you can find your Harness Cluster Location on the Account Overview page under the Account Settings section of the left navigation. For Harness CDCE, the endpoint varies based on the Docker vs. Helm installation options.
| Harness Cluster Location | Harness Manager Endpoint on Harness Cluster |
|---|---|
| SaaS prod-1 | https://app.harness.io |
| SaaS prod-2 | https://app.harness.io/gratis |
| SaaS prod-3 | https://app3.harness.io |
| CDCE Docker | http://<HARNESS_HOST> if Docker Delegate is remote to CDCE or http://host.docker.internal if Docker Delegate is on same host as CDCE |
| CDCE Helm | http://<HARNESS_HOST>:7143 where HARNESS_HOST is the public IP of the Kubernetes node where CDCE Helm is running |
Run Terraform init, plan, and apply
Initialize Terraform. This downloads the Terraform Helm provider to your machine.
terraform init
Run the following step to view the changes Terraform is going to make on your behalf.
terraform plan
Finally, run this step to make Terraform install the Kubernetes delegate using the Helm provider.
terraform apply
When prompted by Terraform if you want to continue with the apply step, type yes, and then you will see output similar to the following.
helm_release.delegate: Creating...
helm_release.delegate: Still creating... [10s elapsed]
helm_release.delegate: Still creating... [20s elapsed]
helm_release.delegate: Still creating... [30s elapsed]
helm_release.delegate: Still creating... [40s elapsed]
helm_release.delegate: Still creating... [50s elapsed]
helm_release.delegate: Still creating... [1m0s elapsed]
helm_release.delegate: Creation complete after 1m0s [id=firstk8sdel]

Apply complete! Resources: 1 added, 0 changed, 0 destroyed.
Download a Kubernetes manifest template
curl -LO https://raw.githubusercontent.com/harness/delegate-kubernetes-manifest/main/harness-delegate.yaml
Replace variables in the template
Open the harness-delegate.yaml file in a text editor and replace PUT_YOUR_DELEGATE_NAME_HERE, PUT_YOUR_HARNESS_ACCOUNTID_HERE, and PUT_YOUR_DELEGATE_TOKEN_HERE with your delegate name (for example, firstk8sdel), Harness accountId, and delegate token values, respectively.
Replace the PUT_YOUR_MANAGER_HOST_AND_PORT_HERE variable with the Harness Manager Endpoint noted below. For Harness SaaS accounts, you can find your Harness Cluster Location on the Account Overview page under the Account Settings section of the left navigation. For Harness CDCE, the endpoint varies based on the Docker vs. Helm installation options.
| Harness Cluster Location | Harness Manager Endpoint on Harness Cluster |
|---|---|
| SaaS prod-1 | https://app.harness.io |
| SaaS prod-2 | https://app.harness.io/gratis |
| SaaS prod-3 | https://app3.harness.io |
| CDCE Docker | http://<HARNESS_HOST> if Docker Delegate is remote to CDCE or http://host.docker.internal if Docker Delegate is on same host as CDCE |
| CDCE Helm | http://<HARNESS_HOST>:7143 where HARNESS_HOST is the public IP of the Kubernetes node where CDCE Helm is running |
Apply the Kubernetes manifest
kubectl apply -f harness-delegate.yaml
Prerequisite
Ensure that you have the Docker runtime installed on your host. If not, use one of the following options to install Docker:
Install on Docker
Now you can install the delegate using the following command.
docker run --cpus=1 --memory=2g \
  -e DELEGATE_NAME=docker-delegate \
  -e NEXT_GEN="true" \
  -e DELEGATE_TYPE="DOCKER" \
  -e ACCOUNT_ID=PUT_YOUR_HARNESS_ACCOUNTID_HERE \
  -e DELEGATE_TOKEN=PUT_YOUR_DELEGATE_TOKEN_HERE \
  -e LOG_STREAMING_SERVICE_URL=PUT_YOUR_MANAGER_HOST_AND_PORT_HERE/log-service/ \
  -e MANAGER_HOST_AND_PORT=PUT_YOUR_MANAGER_HOST_AND_PORT_HERE \
  harness/delegate:23.03.78904
Replace the PUT_YOUR_MANAGER_HOST_AND_PORT_HERE variable with the Harness Manager Endpoint noted below. For Harness SaaS accounts, you can find your Harness Cluster Location on the Account Overview page under the Account Settings section of the left navigation. For Harness CDCE, the endpoint varies based on the Docker vs. Helm installation options.
| Harness Cluster Location | Harness Manager Endpoint on Harness Cluster |
|---|---|
| SaaS prod-1 | https://app.harness.io |
| SaaS prod-2 | https://app.harness.io/gratis |
| SaaS prod-3 | https://app3.harness.io |
| CDCE Docker | http://<HARNESS_HOST> if Docker Delegate is remote to CDCE or http://host.docker.internal if Docker Delegate is on same host as CDCE |
| CDCE Helm | http://<HARNESS_HOST>:7143 where HARNESS_HOST is the public IP of the Kubernetes node where CDCE Helm is running |
To use local runner build infrastructure, modify the delegate command using the instructions to install the delegate in Use local runner build infrastructure
Verify delegate connectivity
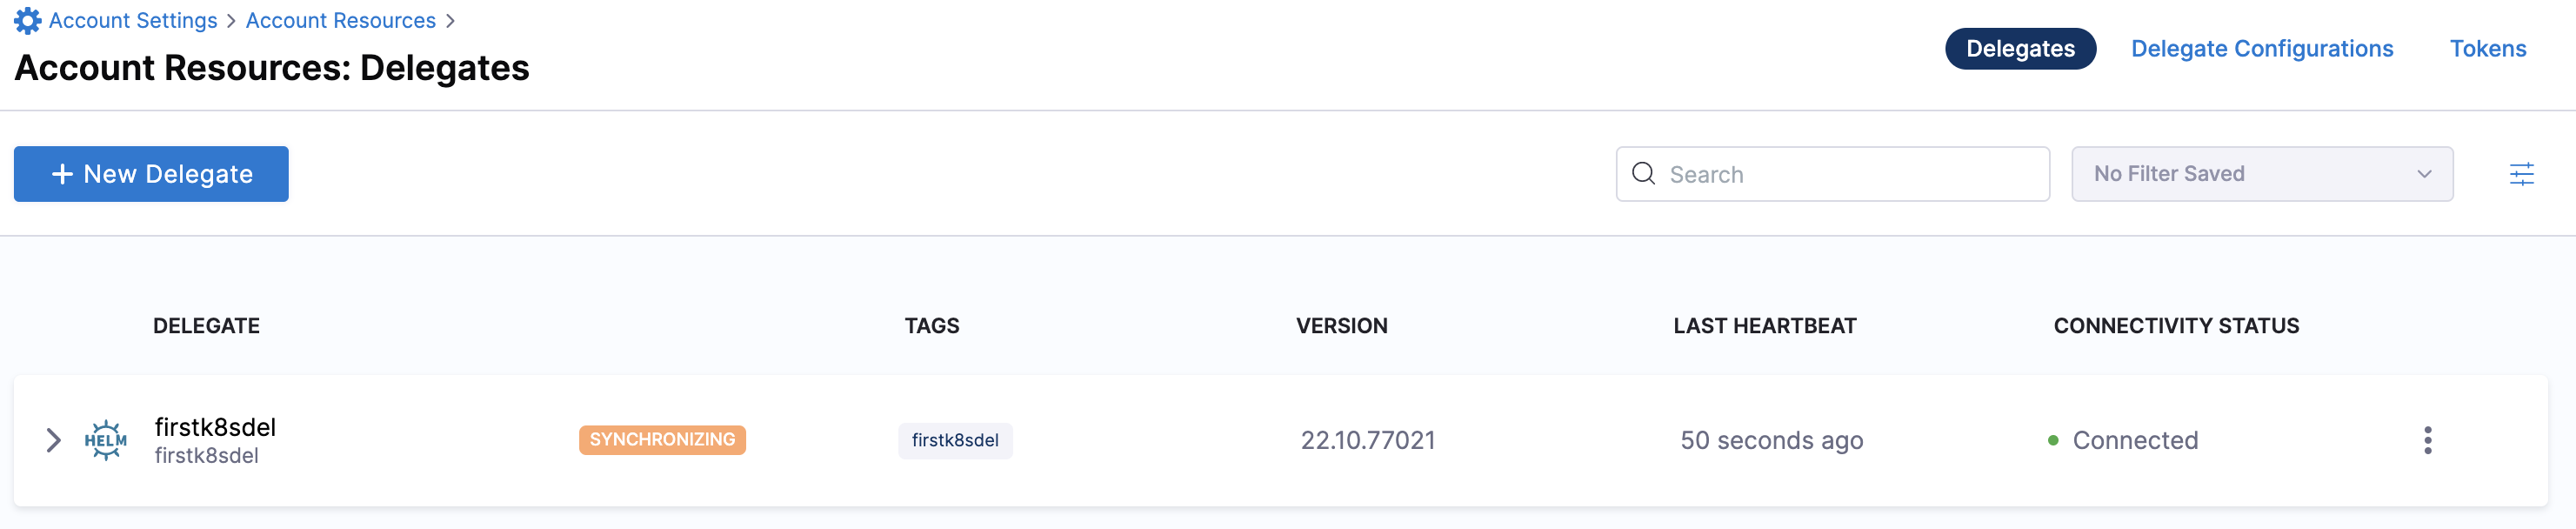
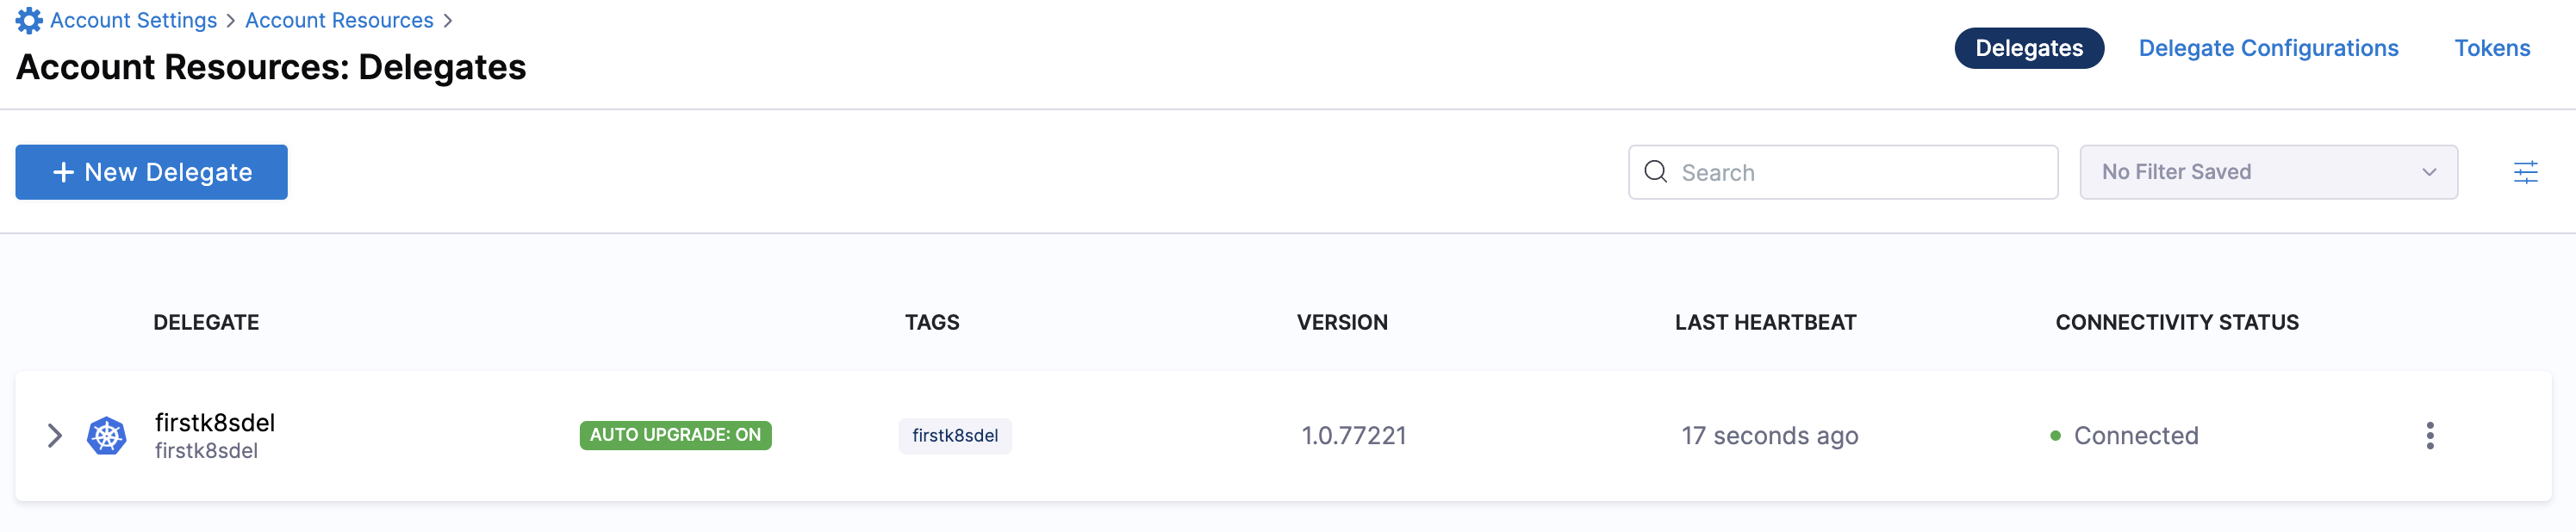
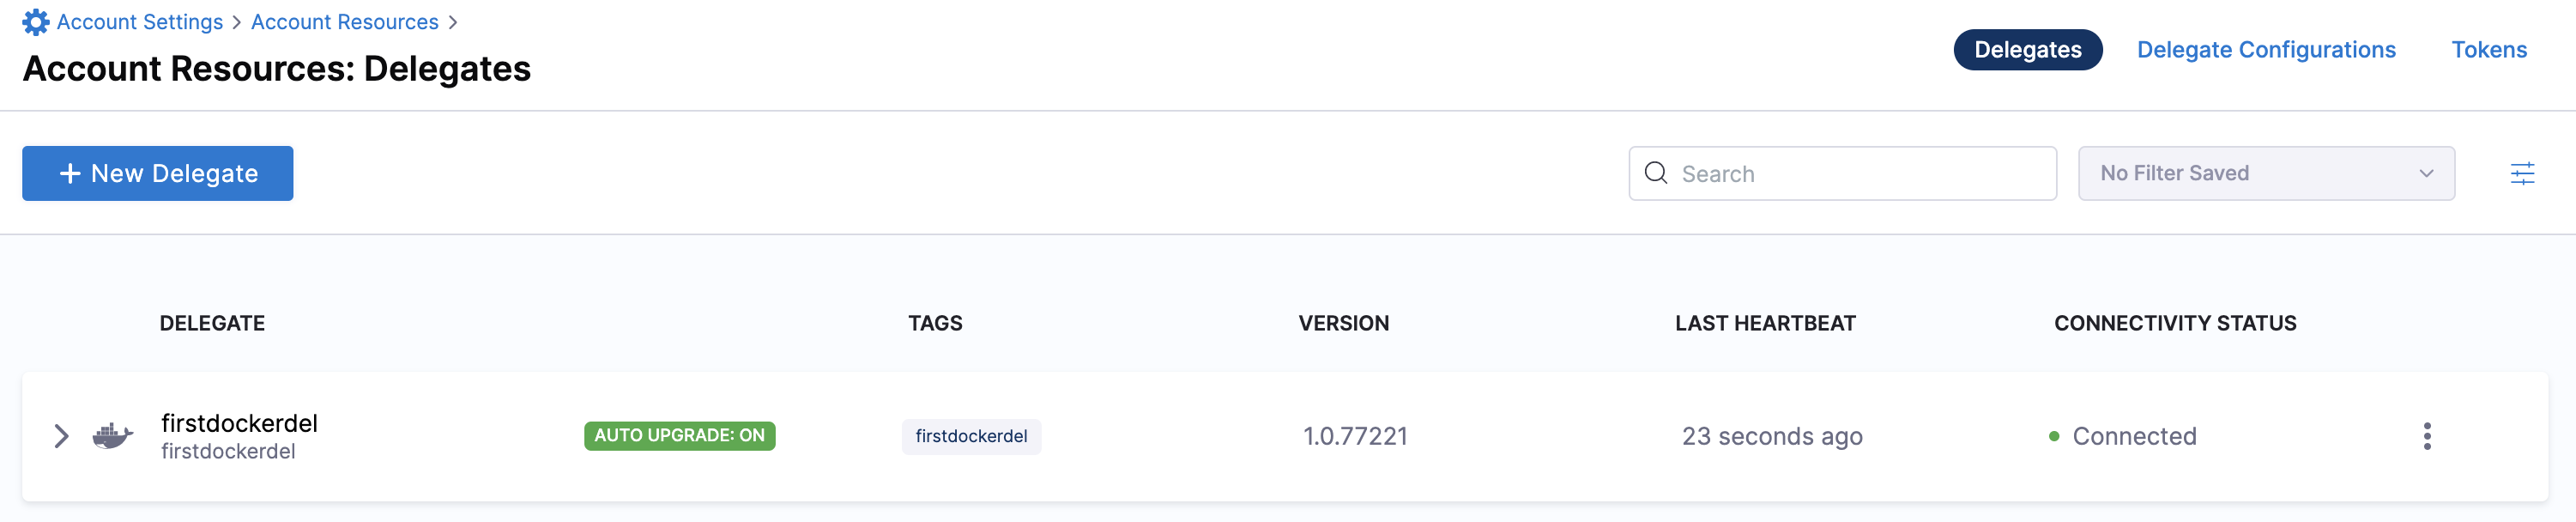
Select Continue. After the health checks pass, your delegate is available for you to use. Select Done and verify your new delegate is listed.
Helm chart & Terraform Helm provider
Kubernetes manifest
Docker
You can now route communication to external systems in Harness connectors and pipelines by selecting this delegate via a delegate selector.
Troubleshooting
The delegate installer provides troubleshooting information for each installation process. If the delegate cannot be verified, select Troubleshoot for steps you can use to resolve the problem. This section includes the same information.
Harness asks for feedback after the troubleshooting steps. You are asked, Did the delegate come up?
If the steps did not resolve the problem, select No, and use the form to describe the issue. You'll also find links to Harness Support and to Delegate docs.
- Helm Chart
- Terraform Helm Provider
- Kubernetes Manifest
- Docker
Use the following steps to troubleshoot your installation of the delegate using Helm.
Verify that Helm is correctly installed:
Check for Helm:
helmAnd then check for the installed version of Helm:
helm versionIf you receive the message
Error: rendered manifests contain a resource that already exists..., delete the existing namespace, and retry the Helm upgrade command to deploy the delegate.For further instructions on troubleshooting your Helm installation, go to Helm troubleshooting guide.
Check the status of the delegate on your cluster:
kubectl describe pods -n <namespace>If the pod did not start, check the delegate logs:
kubectl logs -f <harnessDelegateName> -n <namespace>If the state of the delegate pod is
CrashLoopBackOff, check your allocation of compute resources (CPU and memory) to the cluster. A state ofCrashLoopBackOffindicates insufficent Kubernetes cluster resources.If the delegate pod is not healthy, use the
kubectl describecommand to get more information:kubectl describe <pod_name> -n <namespace>
Use the following steps to troubleshoot your installation of the delegate using Terraform.
Verify that Terraform is correctly installed:
terraform -versionFor further instructions on troubleshooting your installation of Terraform, go to the Terraform troubleshooting guide.
Check the status of the delegate on your cluster:
kubectl describe pods -n <namespace>If the pod did not start, check the delegate logs:
kubectl logs -f <harnessDelegateName> -n <namespace>If the state of the delegate pod is
CrashLoopBackOff, check your allocation of compute resources (CPU and memory) to the cluster. A state ofCrashLoopBackOffindicates insufficent Kubernetes cluster resources.If the delegate pod is not healthy, use the
kubectl describecommand to get more information:kubectl describe <pod_name> -n <namespace>
Use the following steps to troubleshoot your installation of the delegate using Kubernetes.
Check the status of the delegate on your cluster:
kubectl describe pods -n <namespace>If the pod did not start, check the delegate logs:
kubectl logs -f <harnessDelegateName> -n <namespace>If the state of the delegate pod is
CrashLoopBackOff, check your allocation of compute resources (CPU and memory) to the cluster. A state ofCrashLoopBackOffindicates insufficent Kubernetes cluster resources.If the delegate pod is not healthy, use the
kubectl describecommand to get more information:kubectl describe <pod_name> -n <namespace>
Use the following steps to troubleshoot your installation of the delegate using Docker:
Check the status of the delegate on your cluster:
docker container ls -aIf the pod is not running, check the delegate logs:
docker container logs <delegatename> -fRestart the delegate container. To stop the container:
docker container stop <delegatename>To start the container:
docker container start <delegatename>Make sure the container has sufficient CPU and memory resources. If not, remove the older containers:
docker container rm [container id]
The default delegate image, denoted by the yy.mm.xxxxx image tag, includes a set of pre-installed 3rd-party custom binaries for convenience. You can find the list of these binaries here. If you are concerned about the security vulnerabilities that potentially come with these pre-installed binaries, our recommendation is to use the minimal delegate noted below.
Install minimal delegate with 3rd party custom binaries
The minimal delegate image, denoted by the yy.mm.xxxxx.minimal image tag, does not include any pre-installed 3rd-party custom binaries for ensuring the lowest footprint and hence lowest number of security vulnerabilities.
Use INIT_SCRIPT
This option installs the 3rd party custom binaries on a delegate container instance without changing the delegate image itself. Below is an inline tutorial that shows you how to use this option. You can also review the tutorial directly here.
Use INIT_SCRIPT
Delegates are packaged with third-party SDKs that support Kubernetes, Helm, and other Harness-integrated tools. The SDKs are included on the delegate image as binary files; depending on the tool, multiple versions are included.
Harness provides a "minimal" delgate image that does not include third-party SDKs. You can use YAML to configure the minimal delegate image for the installation of the tools and versions you select. You can install software on the delegate using the INIT_SCRIPT environment variable.
For a list of the SDK versions that are certified for different types of deployments, go to Delegate-required SDKs.
Use cases
The primary use cases for customization of the delegate image include:
Vulnerability scans detect unresolved vulnerabilities in older binary versions. You want to use binaries that reduce your attack surface.
You're interested in using tools that Harness does not include on the delegate image.
The remainder of this topic explains the process.
The toolset you install on the delegate minimal image must include the SDKs that Harness requires to perform tasks.
Edit the delegate YAML
To install a delegate, you download its YAML file and run it in your environment.
Before you run the delegate, edit the YAML file to change the following:
- Delegate environment variables
- Delegate image
Add Harness-required SDKs
In the delegate container spec, use the INIT_SCRIPT environment variable to download the certified SDK versions that Harness requires.
The SDKs you need to add depend on the type of deployment. For a list of the SDK versions that are certified for different types of deployments, go to Delegate-required SDKs.
For more information on how to use the INIT_SCRIPT environment variable, go to Build custom delegate images with third-party tools.
Example Kubernetes manifest with required SDK downloads
The following delegate YAML contains examples of downloads for all Harness-required SDKs.
You can edit the YAML to include only the SDKs and versions Harness requires for your deployment type.
...
        - name: DELEGATE_TYPE
          value: "KUBERNETES"
        - name: DELEGATE_NAMESPACE
          valueFrom:
            fieldRef:
              fieldPath: metadata.namespace
        - name: INIT_SCRIPT
          value: |

            ## Kubectl
            curl -L0 https://dl.k8s.io/release/v1.24.3/bin/linux/amd64/kubectl -o kubectl
            chmod +x ./kubectl
            mv kubectl /usr/local/bin/

            ## Helm V3
            curl -L0 https://get.helm.sh/helm-v3.9.2-linux-amd64.tar.gz -o helm-v3.9.2.tar.gz
            tar -xvzf helm-v3.9.2.tar.gz
            chmod +x ./linux-amd64/helm
            mv ./linux-amd64/helm /usr/local/bin/

            ## Kustomize
            curl -L0 https://github.com/kubernetes-sigs/kustomize/releases/download/kustomize%2Fv4.5.4/kustomize_v4.5.4_linux_amd64.tar.gz -o kustomize_v4.5.4.tar.gz
            tar -xvzf kustomize_v4.5.4.tar.gz
            chmod +x ./kustomize
            mv kustomize /usr/local/bin/

            ## OpenShift OC
            curl -L0 https://mirror.openshift.com/pub/openshift-v4/clients/oc/latest/linux/oc.tar.gz -o oc.tar.gz
            tar -xvzf oc.tar.gz
            chmod +x ./oc
            mv oc /usr/local/bin/

            ## go-template
            mkdir -p /opt/harness-delegate/client-tools/go-template/v0.4.1/
            curl -L0 https://app.harness.io/public/shared/tools/go-template/release/v0.4.1/bin/linux/amd64/go-template -o go-template
            chmod +x ./go-template
            mv go-template /usr/local/bin/

            curl -L https://get.helm.sh/chartmuseum-v0.14.0-linux-amd64.tar.gz -o chartmuseum-v0.14.tar.gz
            tar xzvf chartmuseum-v0.14.tar.gz
            chmod +x ./linux-amd64/chartmuseum
            mv ./linux-amd64/chartmuseum /usr/local/bin/

            cd /opt/harness-delegate
...
You can modify the export PATH as needed using the following command:
export PATH=/opt/harness-delegate/custom-client-tools/:<path>
Add your custom tools
In the delegate container spec, use the INIT_SCRIPT environment variable to download any additional tools you want to add.
See also
Build a custom image
This option installs the 3rd party custom binaries on a new custom delegate image that uses the Harness minimal delegate image as its base image. Below is an inline tutorial that shows you how to use this option. You can also review the tutorial directly here.
Build a custom image
Harness Manager installs and configures delegates with the binaries that most CI/CD pipelines require. In some cases, however, a preconfigured image isn’t the right fit. For example, preconfigured images can:
- Introduce the vulnerabilities of the binaries they include.
- Restrict you to the use of the included third-party tools and versions.
This document explains how you can:
- Build and host a custom delegate image that includes the tools you select.
- Use your custom delegate in CI/CD pipelines.
Select the delegate image
You can build on either of the following Harness-provided images.
| Image | Description |
|---|---|
| Harness Delegate Docker image | A publicly available Docker image providing Harness Delegate. |
| Harness Minimal Delegate Docker image | A minimal delegate image available in Docker Hub at https://hub.docker.com/r/harness/delegate/tags. |
Use the last published yy.mm.xxxxx version of the minimal image from the Docker repository.

Build the delegate image
When you build a custom delegate image, you modify the image you select with user privileges and binaries. This section explains the build script used for the process. In this example, the script builds a custom image for deployment by Kubernetes and by Terraform.
The first lines of the script provide information about the base image and user privileges. This example uses the minimal image with delegate minor version 77029.
FROM harness/delegate:22.10.77029.minimal
USER root
The delegate container is granted root user privileges.
The first RUN block installs or updates the unzip and yum-utils tools. The --nodocs option prevents the installation of documentation on the image.
RUN microdnf update \
  && microdnf install --nodocs \
    unzip \
    yum-utils
The second RUN block uses the yum utility to create a configuration file for the HashiCorp repository, and then uses the microdnf package manager to install the required Terraform components:
RUN yum-config-manager --add-repo https://rpm.releases.hashicorp.com/RHEL/hashicorp.repo \
  && microdnf install -y terraform
The final RUN block retrieves the Kubernetes kubectl command-line tool that is required to manipulate clusters. The Linux chmod +x instruction makes the utility executable:
RUN mkdir /opt/harness-delegate/tools && cd /opt/harness-delegate/tools \
  && curl -LO "https://dl.k8s.io/release/$(curl> -L -s https://dl.k8s.io/release/stable.txt)/bin/linux/amd64/kubectl" && chmod +x kubectl
The final instruction defines the Linux $PATH environment variable that provides the location of the tools to be installed:
ENV PATH=/opt/harness-delegate/tools/:$PATH
The complete script is as follows:
FROM harness/delegate:22.10.77029.minimal
USER root

RUN microdnf update \
  && microdnf install --nodocs \
    unzip \
    yum-utils

RUN yum-config-manager --add-repo https://rpm.releases.hashicorp.com/RHEL/hashicorp.repo \
  && microdnf install -y terraform

RUN mkdir /opt/harness-delegate/tools && cd /opt/harness-delegate/tools \
  && curl -LO "https://dl.k8s.io/release/$(curl -L -s https://dl.k8s.io/release/stable.txt)/bin/linux/amd64/kubectl" && chmod +x kubectl

ENV PATH=/opt/harness-delegate/tools/:$PATH
Upload the image to Docker Hub
The next step is to upload your custom image to Docker Hub. For information on working with Docker repositories, see Manage repositories in the Docker documentation.
Modify the delegate manifest
Before you can deploy a delegate, you must:
- Update the image path to the repository location of the custom image.
- Suspend delegate auto-upgrade functionality.
Delegate auto-upgrade is not compatible with custom images.
Upgrade the image path
Open the delegate manifest file and locate the container spec (spec.containers). Change the image path to reflect the repository location of your uploaded image as shown in the following YAML.
 spec:
     terminationGracePeriodSeconds: 600
     restartPolicy: Always
     containers:
     - image: example/org:custom-delegate
       imagePullPolicy: Always
       name: delegate
       securityContext:
         allowPrivilegeEscalation: false
         runAsUser: 0
For purposes of this example, the image was uploaded to example/org:custom-delegate.
Suspend delegate auto-upgrade
Before you deploy a custom delegate, you must suspend its auto-upgrade functionality. This step prevents your image from being automatically upgraded and the installed binaries removed.
To suspend auto-upgrade, in the delegate manifest, locate the CronJob resource. In the resource spec, set the suspend field to true as shown in the following YAML:
apiVersion: batch/v1beta1
kind: CronJob
metadata:
 labels:
   harness.io/name: custom-del-upgrader-job
 name: custom-del-upgrader-job
 namespace: harness-delegate-ng
spec:
 suspend: true
 schedule: "0 */1 * * *"
 concurrencyPolicy: Forbid
 startingDeadlineSeconds: 20
Example manifest file
For the complete file, expand the following example.
Example manifest
apiVersion: v1
kind: Namespace
metadata:
 name: harness-delegate-ng

---

apiVersion: rbac.authorization.k8s.io/v1
kind: ClusterRoleBinding
metadata:
 name: harness-delegate-ng-cluster-admin
subjects:
 - kind: ServiceAccount
   name: default
   namespace: harness-delegate-ng
roleRef:
 kind: ClusterRole
 name: cluster-admin
 apiGroup: rbac.authorization.k8s.io

---

apiVersion: v1
kind: Secret
metadata:
 name: custom-del-account-token
 namespace: harness-delegate-ng
type: Opaque
data:
 DELEGATE_TOKEN: ""

---

# If delegate needs to use a proxy, please follow instructions available in the documentation
# https://developer.harness.io/docs/first-gen/firstgen-platform/account/manage-delegates/configure-delegate-proxy-settings/

apiVersion: apps/v1
kind: Deployment
metadata:
 labels:
   harness.io/name: custom-del
 name: custom-del
 namespace: harness-delegate-ng
spec:
 replicas: 1
 selector:
   matchLabels:
     harness.io/name: custom-del
 template:
   metadata:
     labels:
       harness.io/name: custom-del
     annotations:
       prometheus.io/scrape: "true"
       prometheus.io/port: "3460"
       prometheus.io/path: "/api/metrics"
   spec:
     terminationGracePeriodSeconds: 600
     restartPolicy: Always
     containers:
     - image: foobar/org:custom-delegate
       imagePullPolicy: Always
       name: delegate
       securityContext:
         allowPrivilegeEscalation: false
         runAsUser: 0
       ports:
         - containerPort: 8080
       resources:
         limits:
           cpu: "0.5"
           memory: "2048Mi"
         requests:
           cpu: "0.5"
           memory: "2048Mi"
       livenessProbe:
         httpGet:
           path: /api/health
           port: 3460
           scheme: HTTP
         initialDelaySeconds: 10
         periodSeconds: 10
         failureThreshold: 2
       startupProbe:
         httpGet:
           path: /api/health
           port: 3460
           scheme: HTTP
         initialDelaySeconds: 30
         periodSeconds: 10
         failureThreshold: 15
       envFrom:
       - secretRef:
           name: custom-del-account-token
       env:
       - name: JAVA_OPTS
         value: "-Xms64M"
       - name: ACCOUNT_ID
         value:
       - name: MANAGER_HOST_AND_PORT
         value: https://app.harness.io/gratis
       - name: DEPLOY_MODE
         value: KUBERNETES
       - name: DELEGATE_NAME
         value: custom-del
       - name: DELEGATE_TYPE
         value: "KUBERNETES"
       - name: DELEGATE_NAMESPACE
         valueFrom:
           fieldRef:
             fieldPath: metadata.namespace
       - name: INIT_SCRIPT
         value: ""
       - name: DELEGATE_DESCRIPTION
         value: ""
       - name: DELEGATE_TAGS
         value: ""
       - name: NEXT_GEN
         value: "true"
       - name: CLIENT_TOOLS_DOWNLOAD_DISABLED
         value: "true"
       - name: LOG_STREAMING_SERVICE_URL
         value: "https://app.harness.io/gratis/log-service/"

---

apiVersion: v1
kind: Service
metadata:
 name: delegate-service
 namespace: harness-delegate-ng
spec:
 type: ClusterIP
 selector:
   harness.io/name: custom-del
 ports:
   - port: 8080

---

kind: Role
apiVersion: rbac.authorization.k8s.io/v1
metadata:
 name: upgrader-cronjob
 namespace: harness-delegate-ng
rules:
 - apiGroups: ["batch", "apps", "extensions"]
   resources: ["cronjobs"]
   verbs: ["get", "list", "watch", "update", "patch"]
 - apiGroups: ["extensions", "apps"]
   resources: ["deployments"]
   verbs: ["get", "list", "watch", "create", "update", "patch"]

---

kind: RoleBinding
apiVersion: rbac.authorization.k8s.io/v1
metadata:
 name: custom-del-upgrader-cronjob
 namespace: harness-delegate-ng
subjects:
 - kind: ServiceAccount
   name: upgrader-cronjob-sa
   namespace: harness-delegate-ng
roleRef:
 kind: Role
 name: upgrader-cronjob
 apiGroup: ""

---

apiVersion: v1
kind: ServiceAccount
metadata:
 name: upgrader-cronjob-sa
 namespace: harness-delegate-ng

---

apiVersion: v1
kind: Secret
metadata:
 name: custom-del-upgrader-token
 namespace: harness-delegate-ng
type: Opaque
data:
 UPGRADER_TOKEN: "NjUxM2FlZWUxODVhMjUyZDdjMDYxNTRmMjU4YWRjYWM="

---

apiVersion: v1
kind: ConfigMap
metadata:
 name: custom-del-upgrader-config
 namespace: harness-delegate-ng
data:
 config.yaml: |
   mode: Delegate
   dryRun: false
   workloadName: custom-del
   namespace: harness-delegate-ng
   containerName: delegate
   delegateConfig:
     accountId: gVcEoNyqQNKbigC_hA3JqA
     managerHost: https://app.harness.io/gratis

---

apiVersion: batch/v1beta1
kind: CronJob
metadata:
 labels:
   harness.io/name: custom-del-upgrader-job
 name: custom-del-upgrader-job
 namespace: harness-delegate-ng
spec:
 suspend: true
 schedule: "0 */1 * * *"
 concurrencyPolicy: Forbid
 startingDeadlineSeconds: 20
 jobTemplate:
   spec:
     template:
       spec:
         serviceAccountName: upgrader-cronjob-sa
         restartPolicy: Never
         containers:
         - image: harness/upgrader:latest
           name: upgrader
           imagePullPolicy: Always
           envFrom:
           - secretRef:
               name: custom-del-upgrader-token
           volumeMounts:
             - name: config-volume
               mountPath: /etc/config
         volumes:
           - name: config-volume
             configMap:
               name: custom-del-upgrader-config
Deploy the delegate
You can deploy the delegate from Harness Manager or by applying the modified delegate manifest file to your cluster.

You can confirm the successful deployment and registration of the delegate in Harness Manager. Check the delegate information to ensure that auto-upgrade is not enabled.
Create pipelines
You can use your registered delegate to run Kubernetes and Terraform pipelines.
For information about creating a Kubernetes pipeline, see Kubernetes deployment tutorial.
For information about creating a Terraform Plan, see Provision with the Terraform Apply Step.
Configure options
Network proxy
This option is detailed in this document.
CI-specific variables
This option is detailed in this document.
Custom certificates
This option is detailed in this document.
Additional installation approaches
Install Docker delegate to Amazon ECS Fargate
The Docker delegate can be installed into Amazon ECS Fargate using this instructions provided in this document.
Install a legacy Kubernetes delegate
The legacy Kubernetes delegate, denoted latest container image tag, is used primarily in Harness FirstGen had the auto-upgrade setting ON by default and did not have the flexibility to turn OFF this setting if needed. This type of delegate is now deprecated for new Harness accounts. Here is a document that shows how to install a legacy Kubernetes delegate.