Harness Git Experience quickstart
This quickstart shows you how to enable and use Git Experience for your Harness resources, such as pipelines.
Harness Git Experience lets you store your resources and configurations in Git and pick Git repos as the source of truth.
Objectives
You'll learn how to:
- Enable Git Experience for a pipeline.
- Create and sync a pipeline with your Git repo.
- Execute a pipeline
Before you begin
Make sure you have the following set up Before you begin this quickstart:
- Make sure you have a Git repo with at least one branch.
- Make sure you have a Git connector with a Personal Access Token (PAT) for your Git account.
- A Personal Access Token (PAT) for your Git account.
- Harness needs the PAT to use the Git platform APIs.
- You add the PAT to Harness as a Text Secret and it is encrypted using a Harness Secret Manager.
- Your Git Personal Access Token is stored in your Harness secret and is a private key to which only you have access. This secret cannot be accessed or referenced by any other user.
- The PAT must have the following scope:
- GitHub:
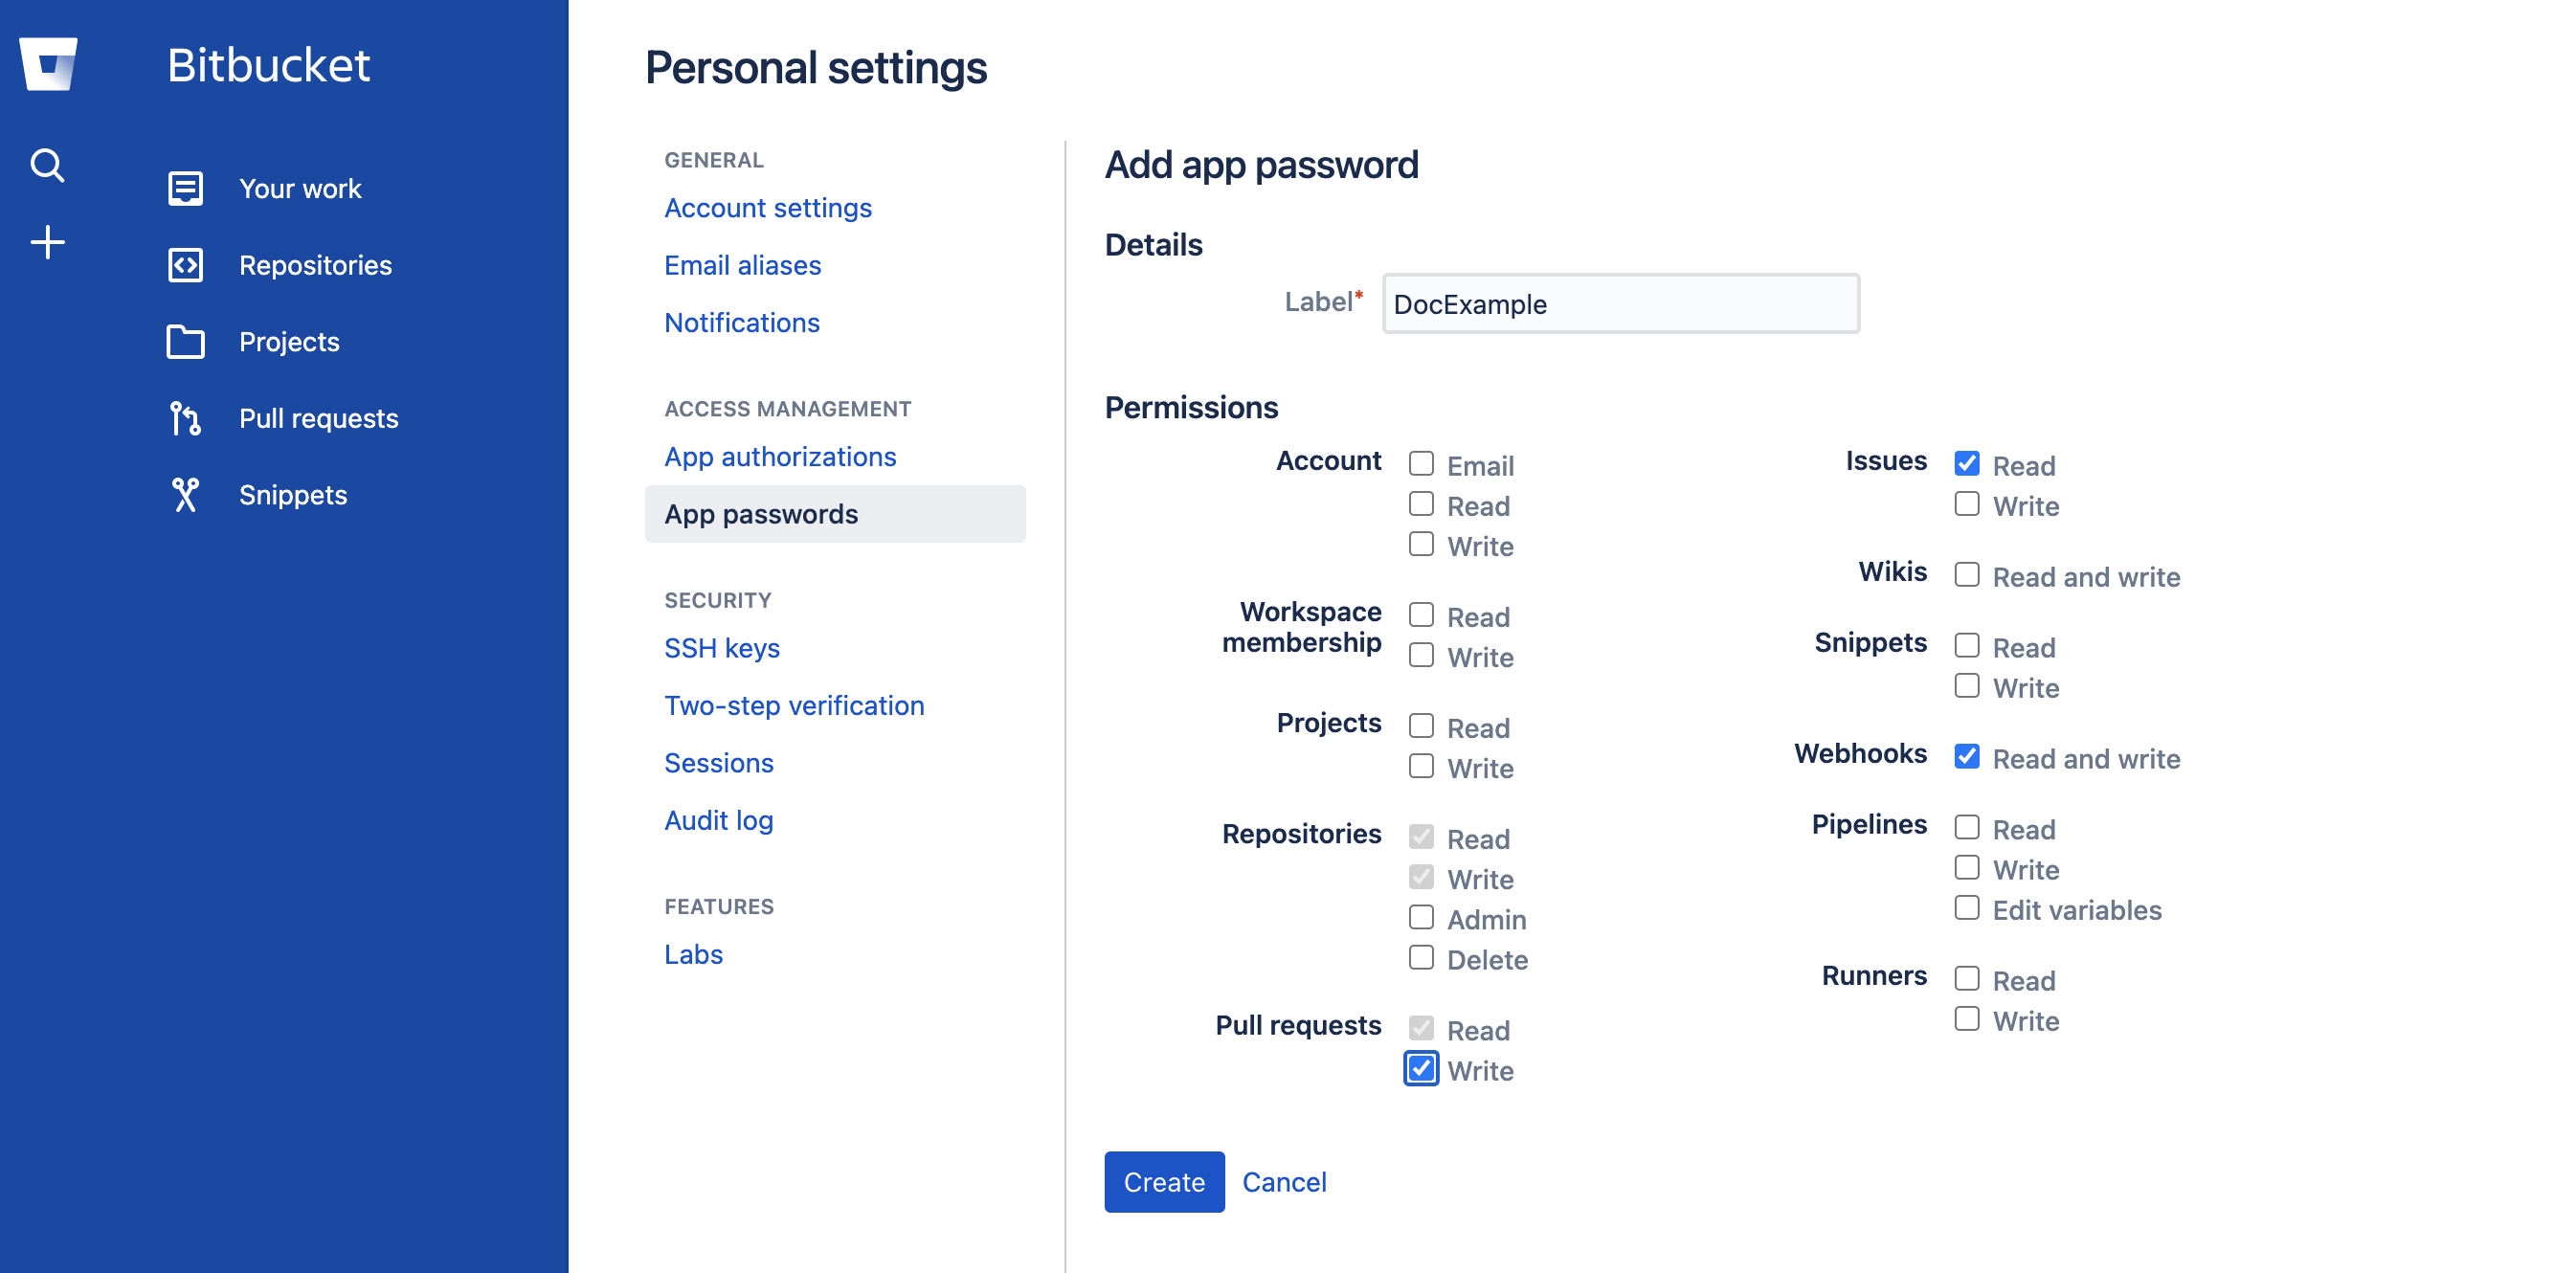
- Bitbucket:
- GitHub:
- To enable Git Experience for your resources, make sure that you have Create/Edit permissions for them.
Make sure your repo has at least one branch, such as main or master. For most Git providers, you simply add a README file to the repo, and the branch is created.
Supported Git providers
The following section lists the support for Git providers for Harness Git Sync:
- GitHub
- Bitbucket Cloud
- Bitbucket Server
- Azure Repos
- GitLab
Make sure feature.file.editor is not set to false in the bitbucket.properties file if you are using Bitbucket on-prem.
Git experience requirements
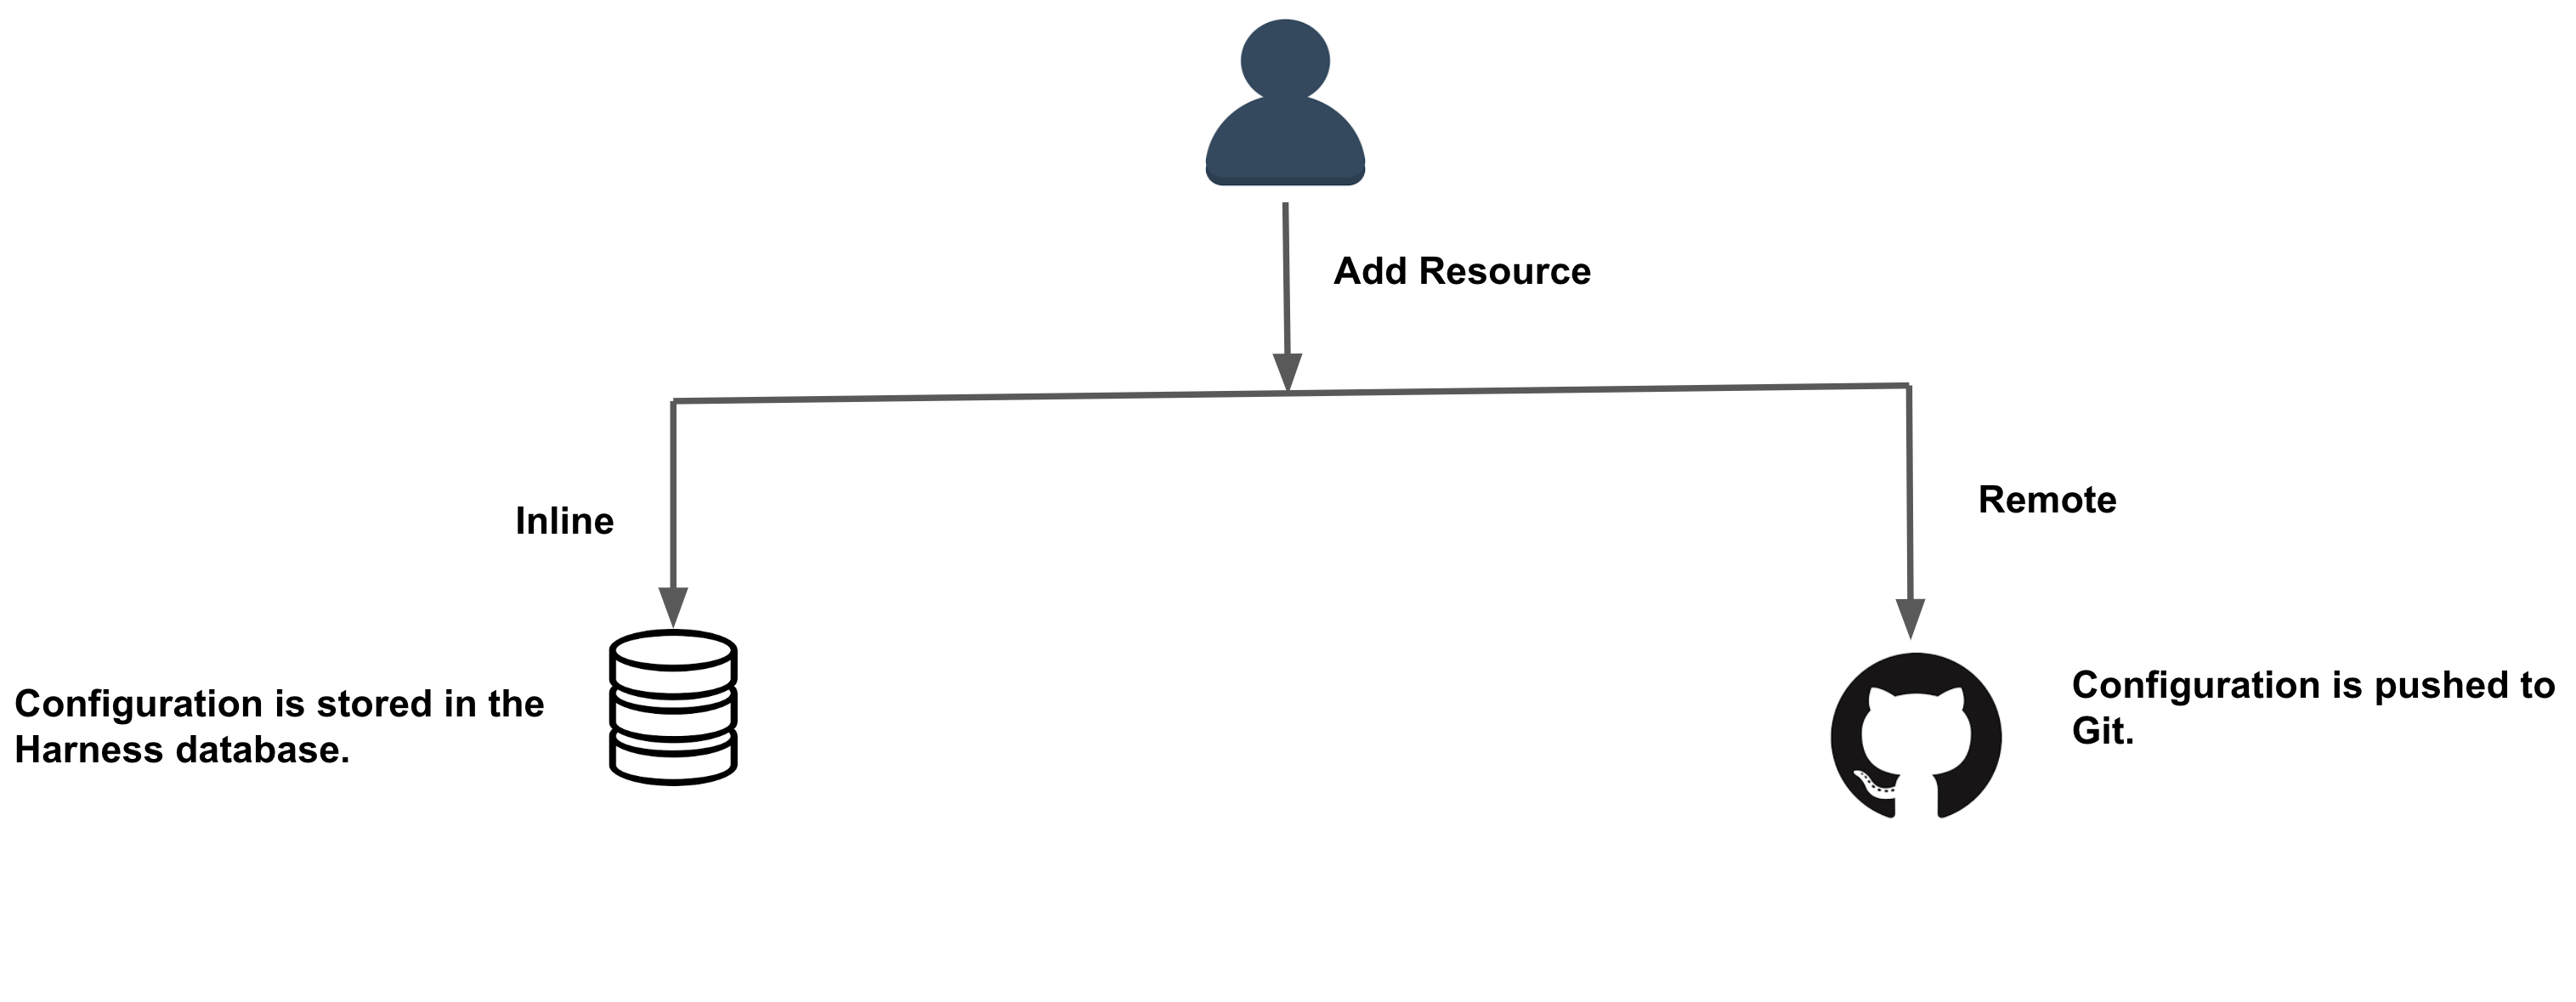
You can store your resources and configurations in Git by selecting the Remote option while creating the resources.
For this, you must specify a Harness Git Connector, a repo, branch details, and a file path.
This topic explains how to create a remote pipeline and execute it using Harness Git Experience.
You can also store your configurations in Harness, by selecting the Inline option while creating resources. For more information on creating an inline pipeline, see Pipelines and Stages.
You can store configurations of the following resources in Git:
- Pipelines
- Input sets
Harness tracks where your configuration is kept and manages the whole lifespan of resources by maintaining metadata for each resource.
Add a remote pipeline
This quickstart explains how to add a pipeline and sync it with your Git repo. This is called the Remote option. To add an inline pipeline, see Remote option. To add an inline pipeline, see Create a Pipeline.
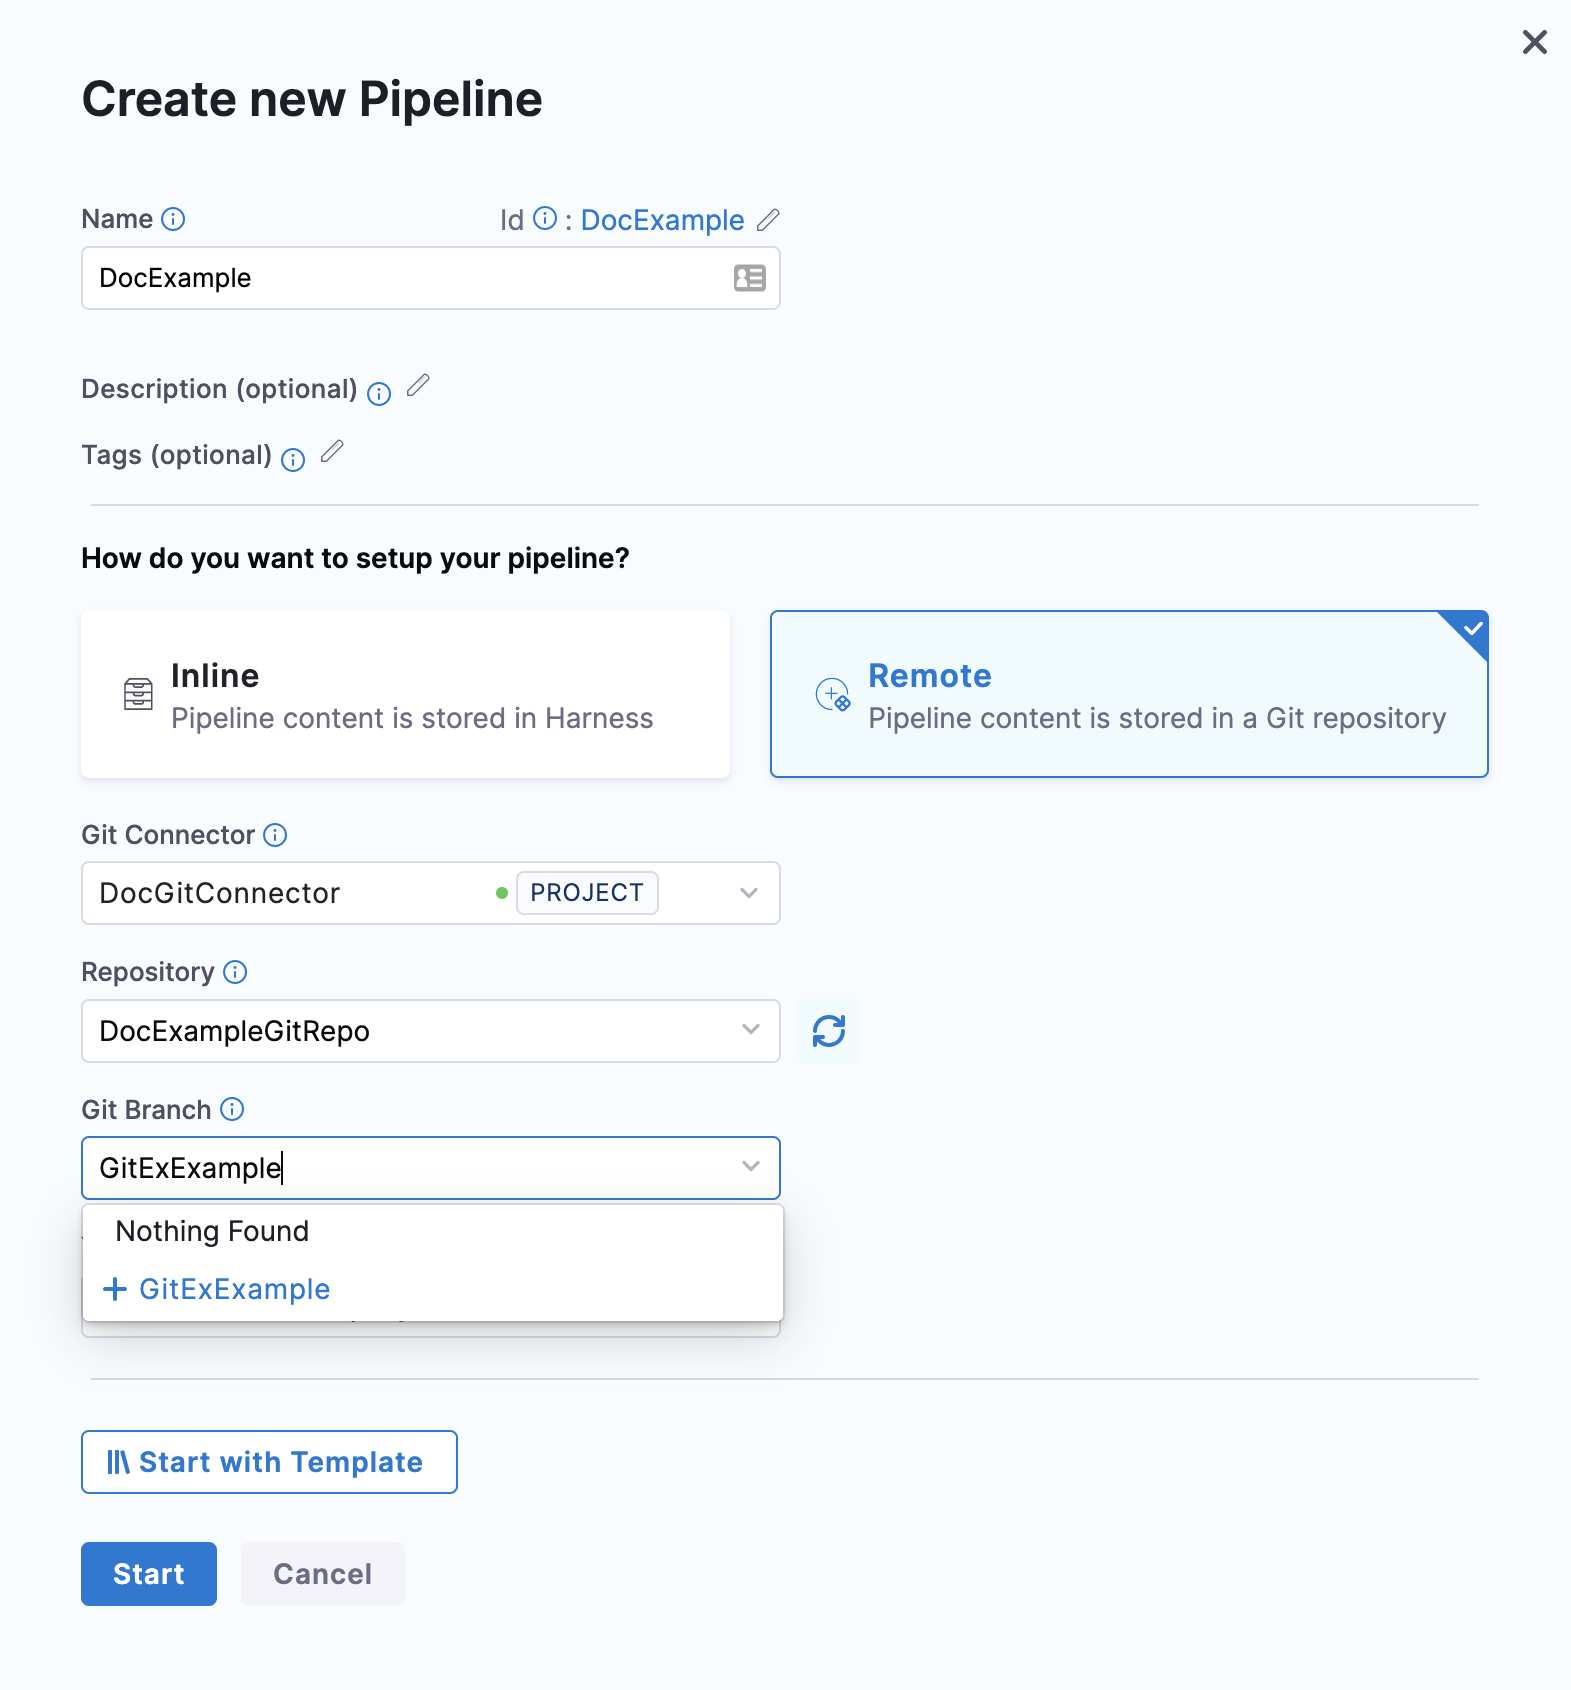
In your Project, click Pipelines and then click Create a Pipeline. The Create New Pipeline settings appear.
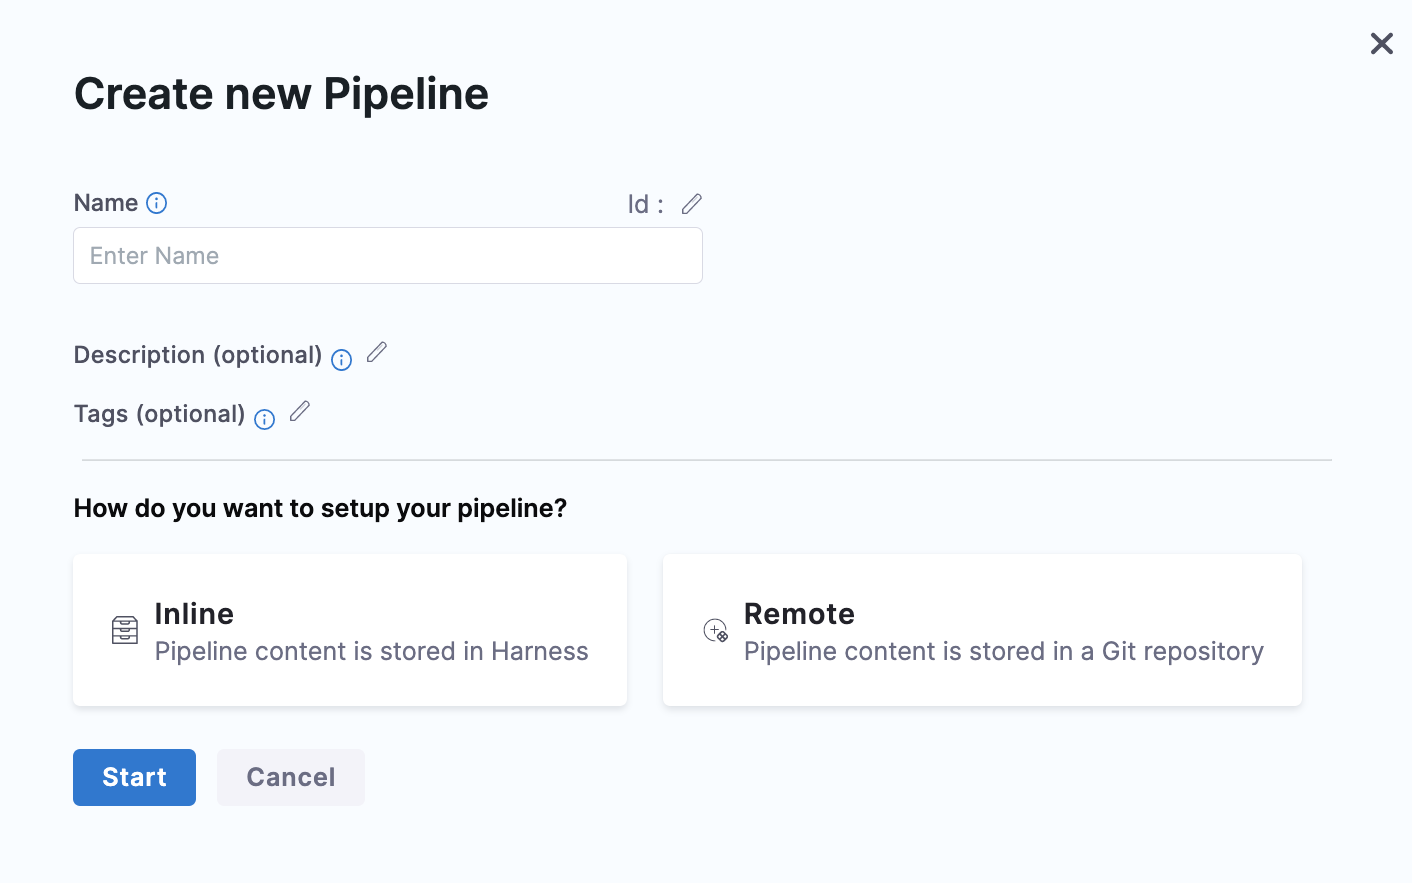
Enter a Name for your pipeline.
Click Remote. The additional settings appear to configure Git Experience.
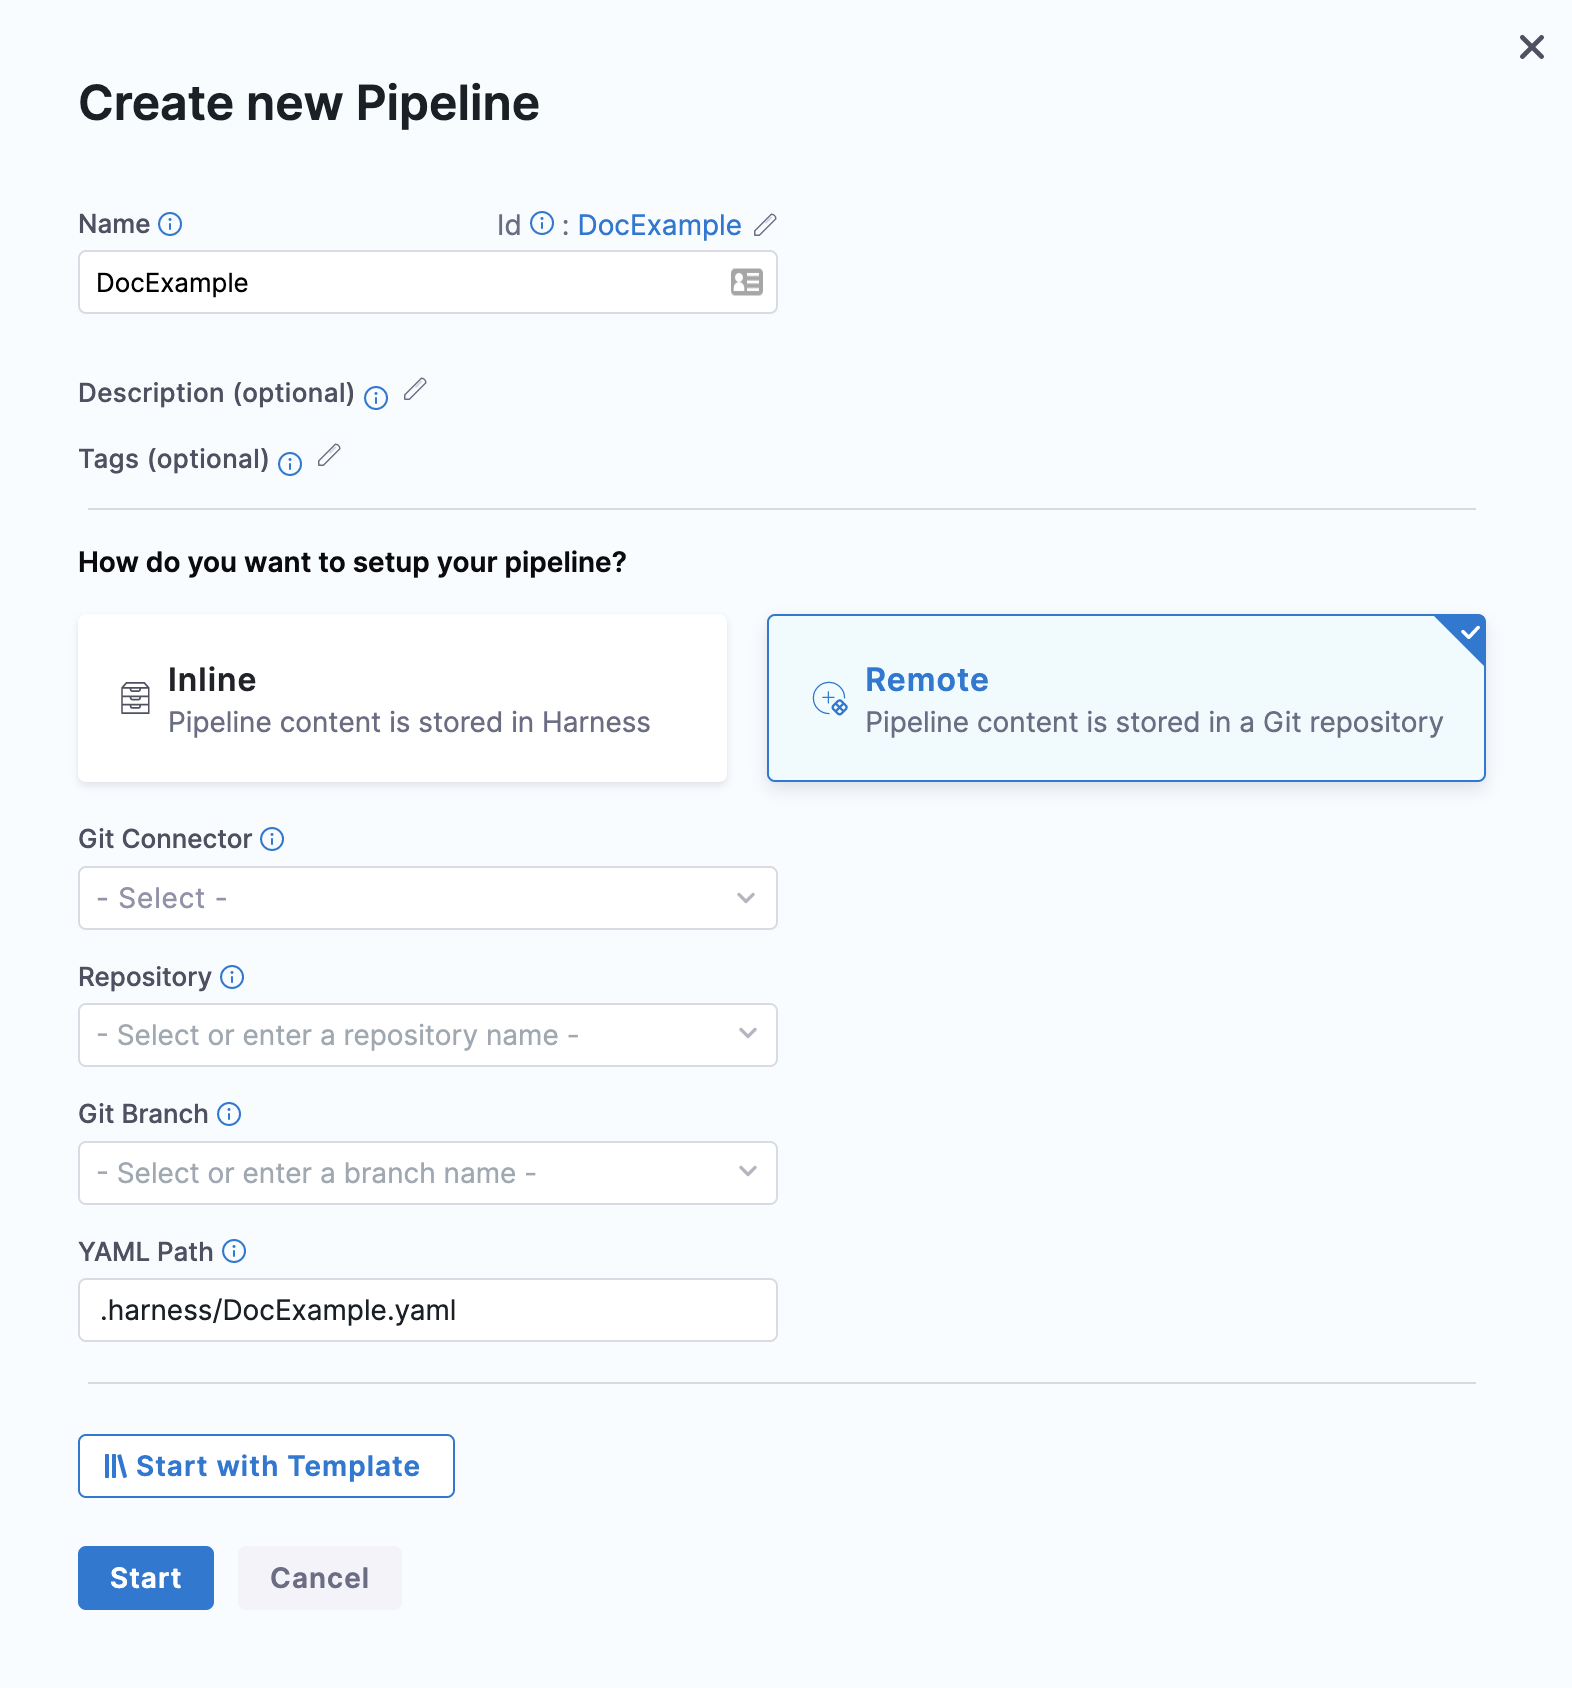
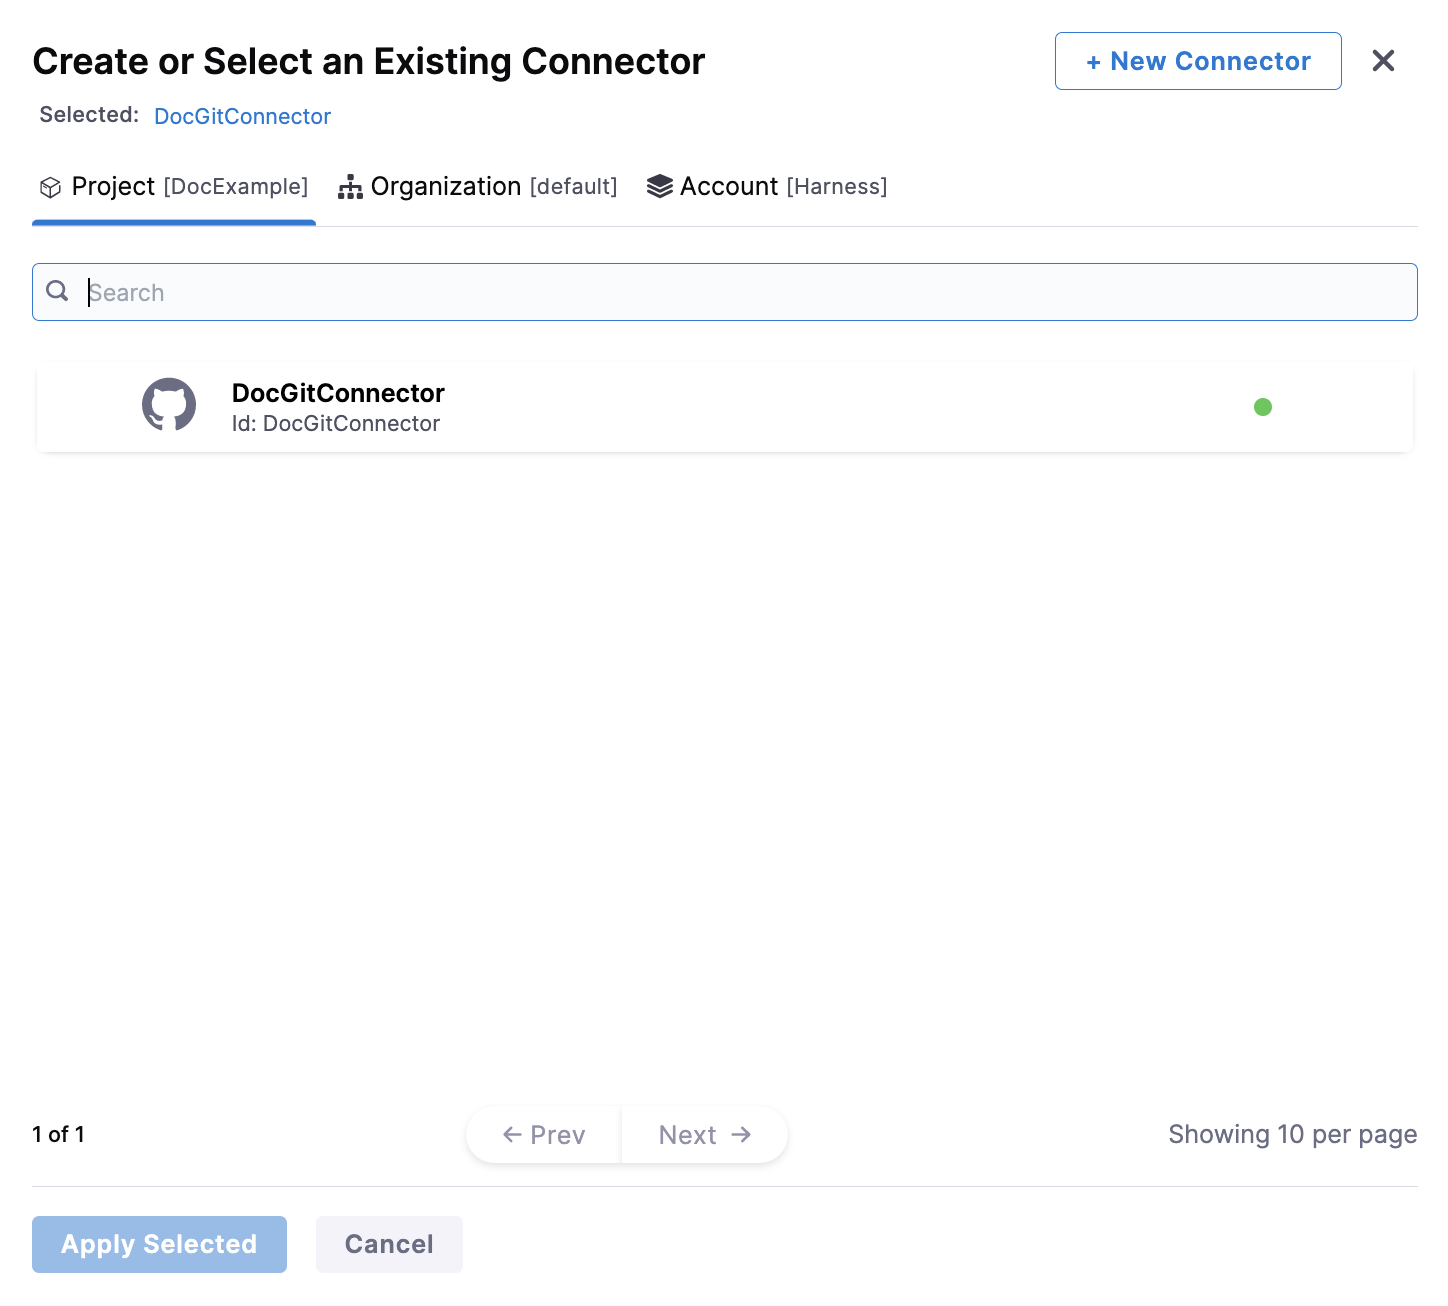
In Git Connector, select or create a Git Connector to the repo for your Project. For steps, see Code Repo Connectors.
IMPORTANT
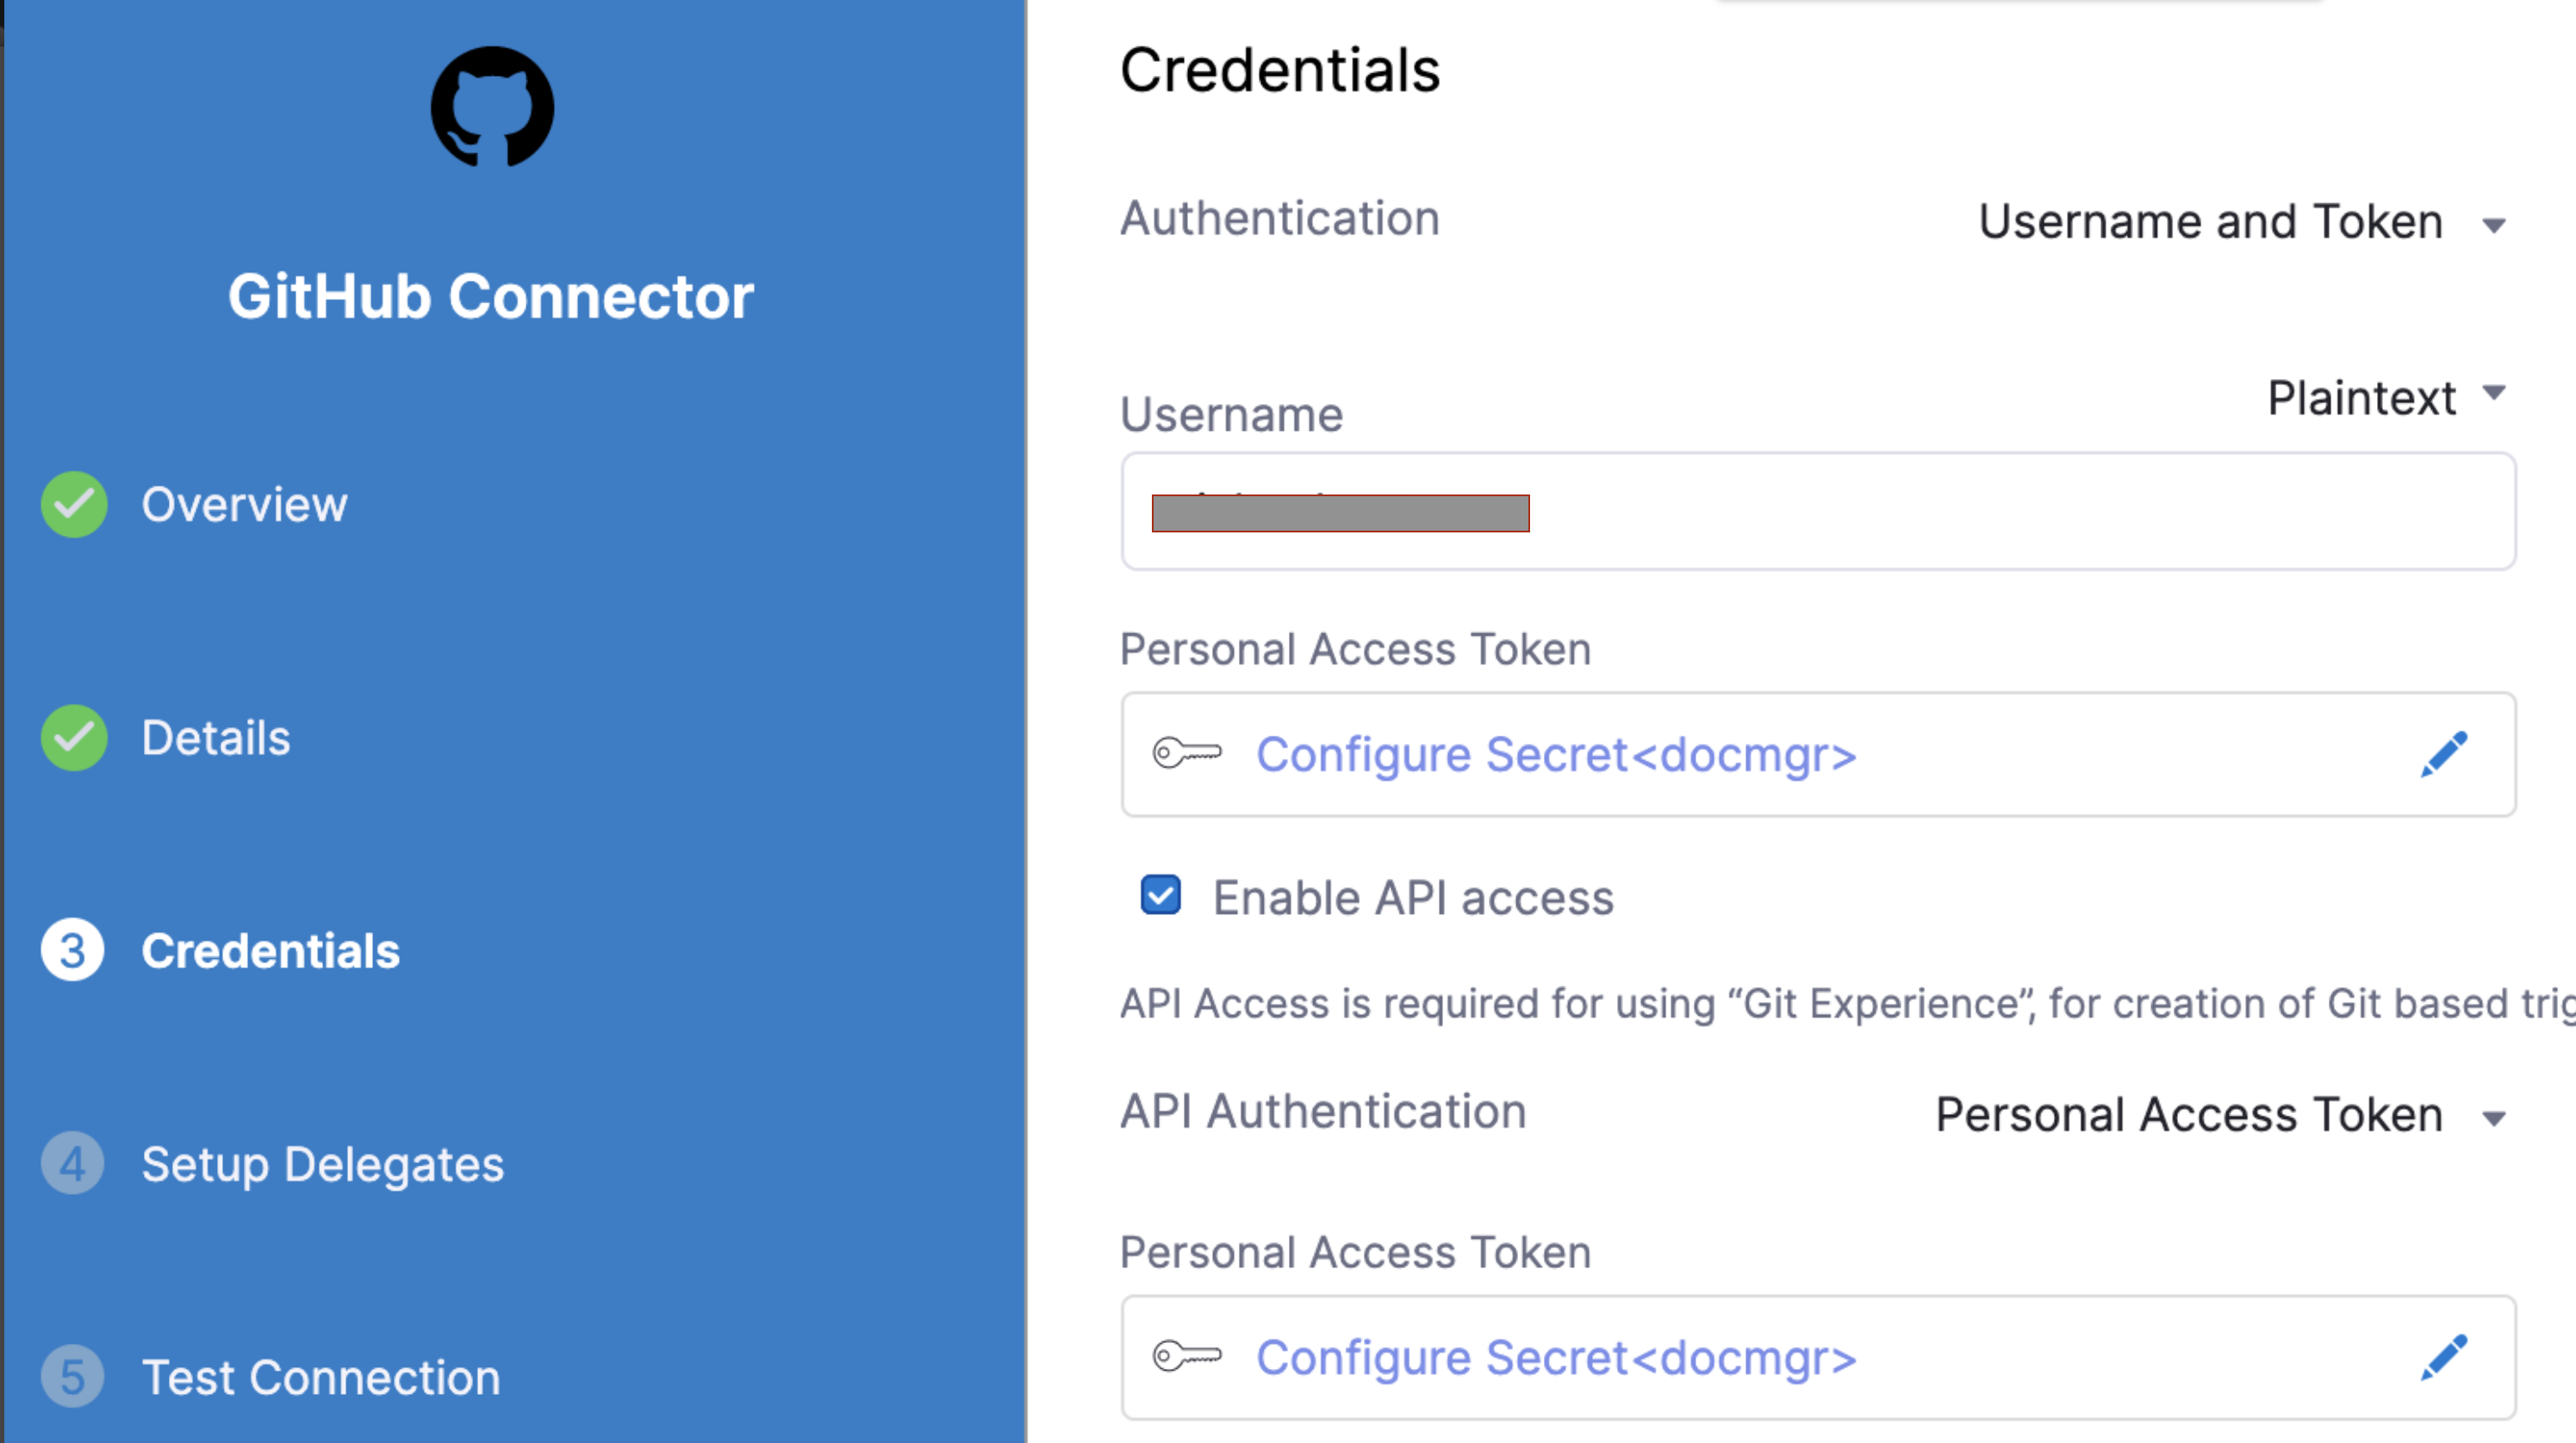
Connector must use the Enable API access option and Token The Connector must use the Enable API access option and Username and Token authentication. Harness requires the token for API access. Generate the token in your account on the Git provider and add it to Harness as a Secret. Next, use the token in the credentials for the Git Connector.

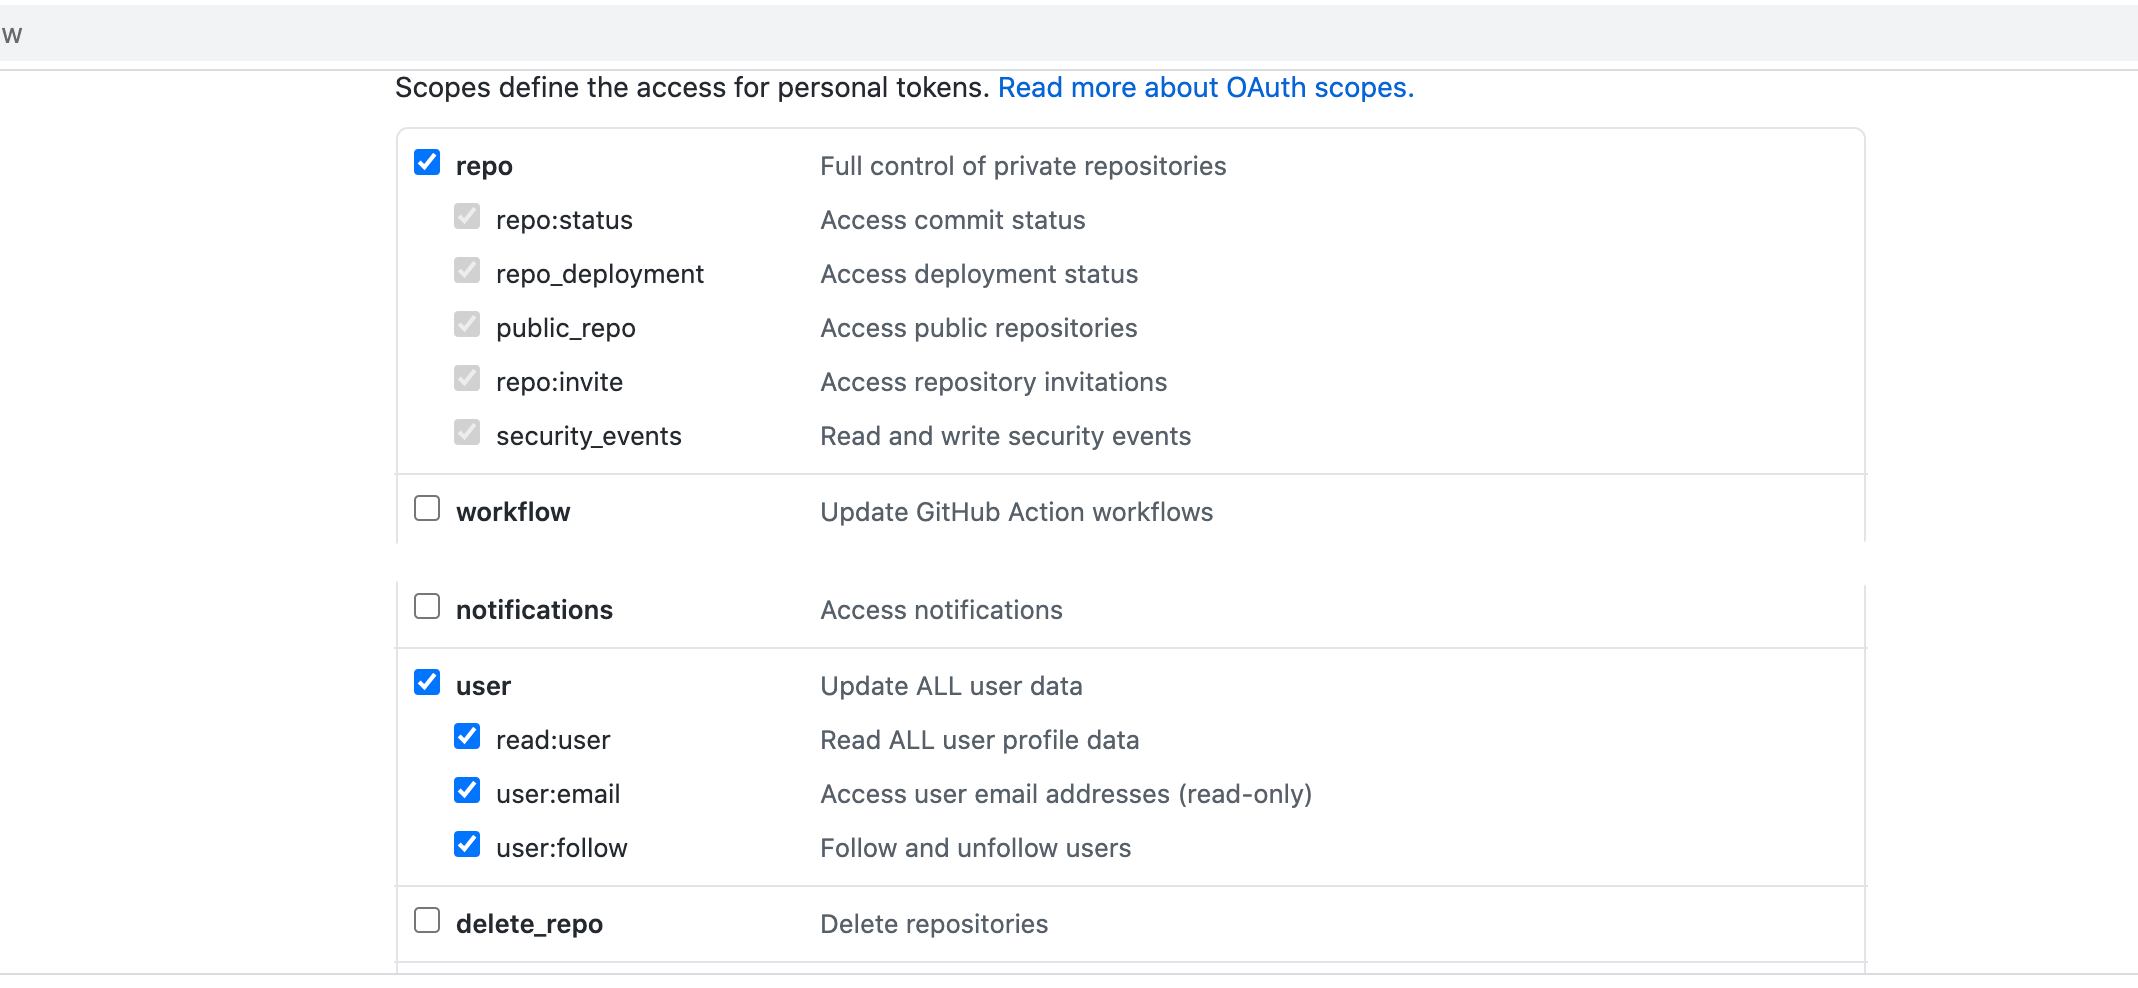
For GitHub, the token must have the following scopes:

Here's an example of a GitHub Connector with the correct settings:
In Repository, select your repository. If your repository isn't listed, enter its name since only a select few repositories are filled here.
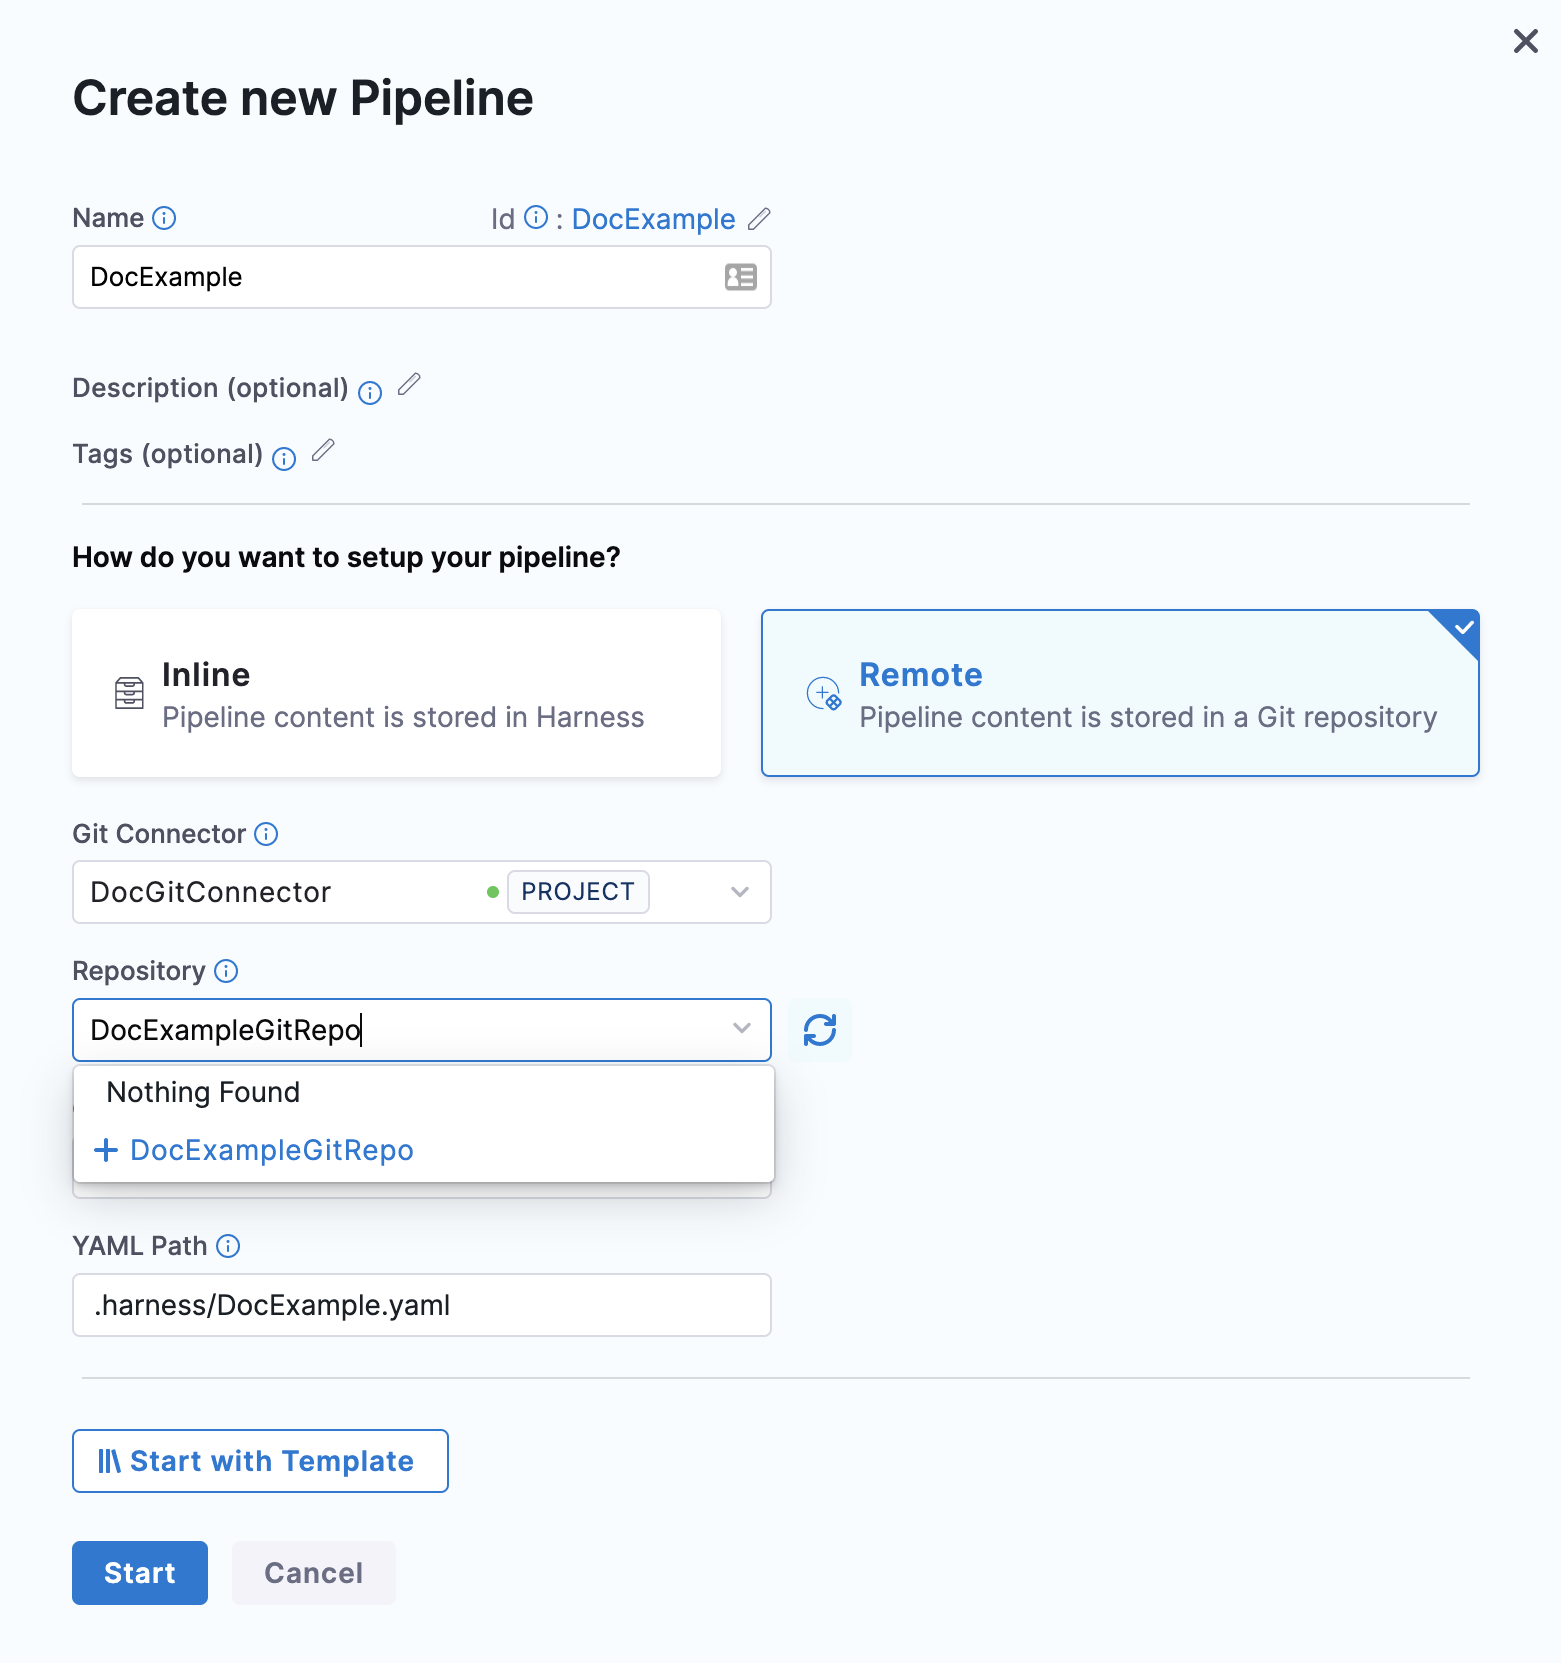
Create the repository in Git before entering it in Select Repository. Harness does not create the repository for you.
In Git Branch, select your branch. If your branch isn't listed, enter its name since only a select few branches are filled here.
Create the branch in your repository before entering it in Git Branch. Harness does not create the branch for you.
Harness pre-populates the YAML Path. You can change this path and the file name. All your configurations are stored in Git in the Harness Folder.
Make sure that your YAML path starts with .harness/ and is unique.
Click Start.
The pipeline Studio is displayed with your repo and branch name.

Add a stage
Click Add Stage. The stage options appear.
Select a stage type and follow its steps.
The steps you see depend on the type of stage you selected.
For more information, see Add Stage.
Add a step and click Save.
The Save Pipelines to Git settings appear.
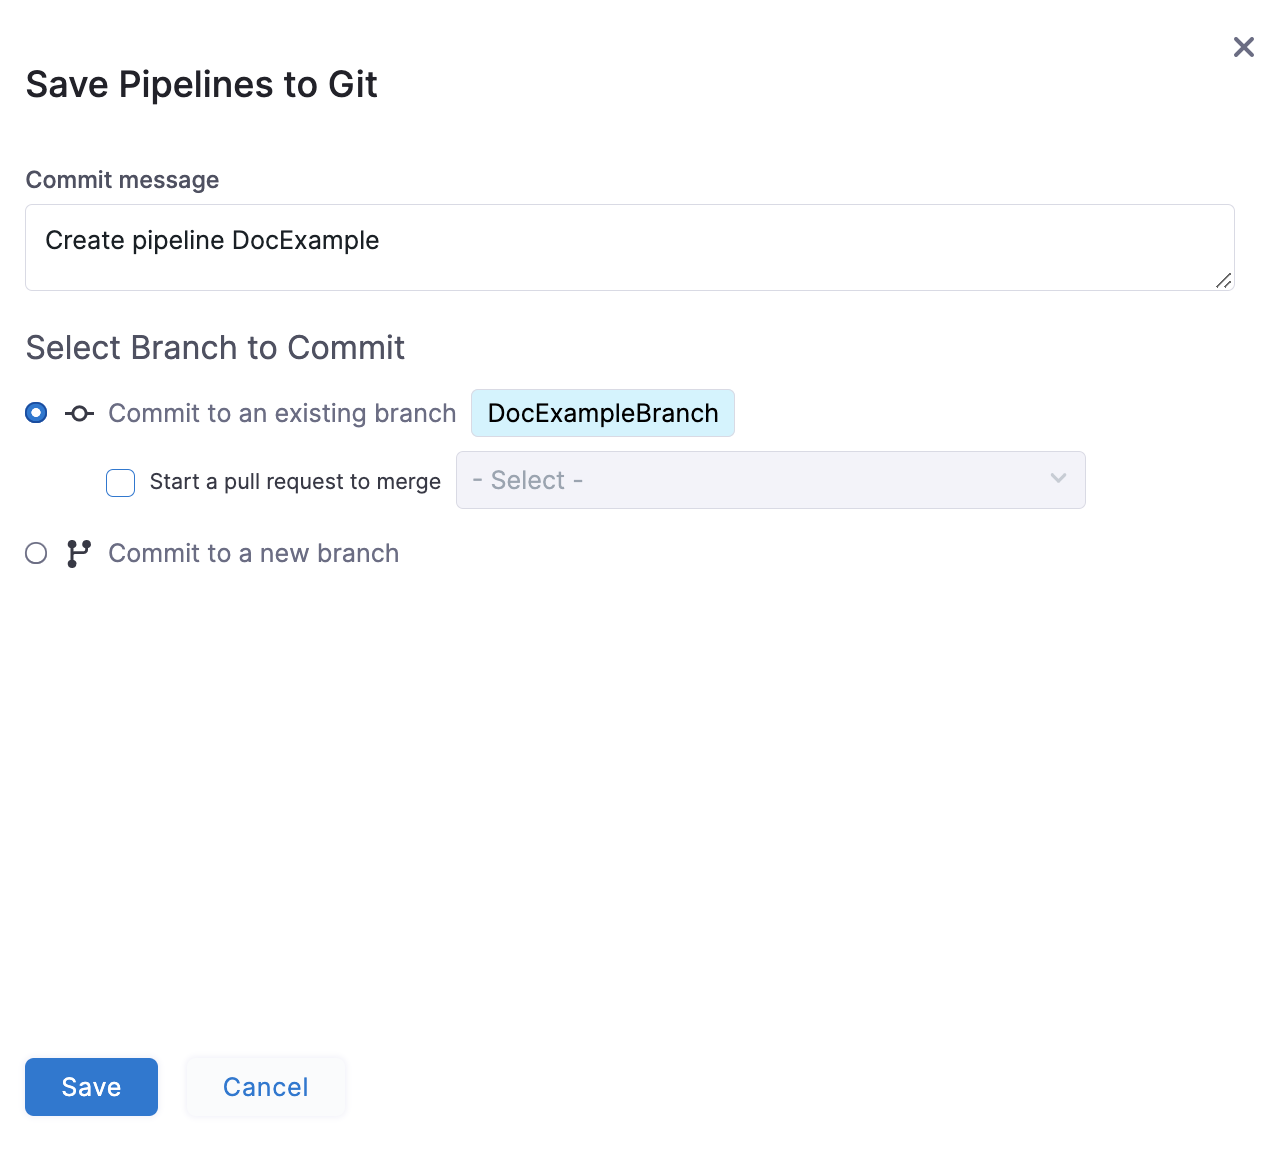
In Select Branch to Commit, commit to an existing or new branch.
- Commit to an existing branch: you can start a pull request if you like.
- Commit to a new branch: enter the new branch name. You can start a pull request if you like.
Click Save.
If you are using Bitbucket on-prem and feature.file.editor is set to false in the bitbucket.properties, make sure you enable Use Git client for commits in the default settings at the account scope. Harness will check out the code on the delegate and use the Git client to make the commits to your Git repository.
Your pipeline is saved to the repo branch.
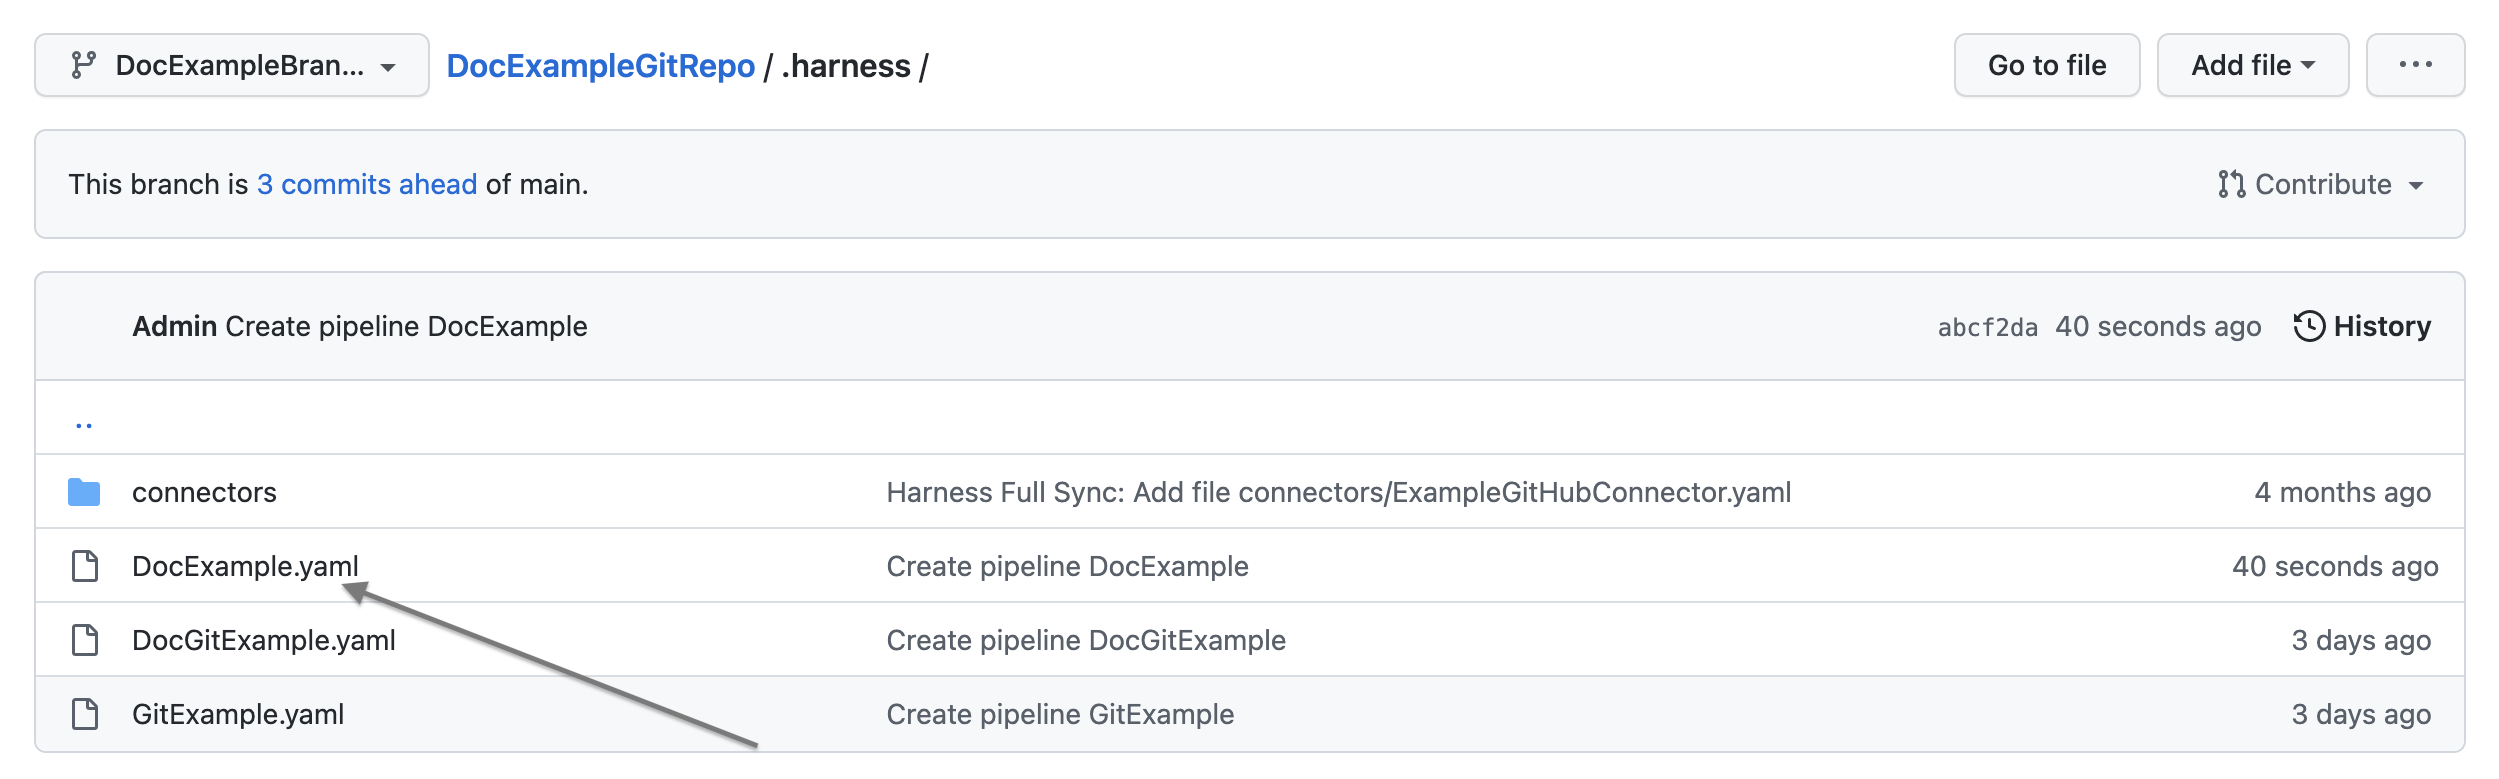
Click the YAML file to see the YAML for the pipeline.
Edit the pipeline YAML. For example, change the name of a step.
Commit your changes to Git.
Return to Harness and refresh the page.
A Pipeline Updated message appears.
Click Update.
The changes you made in Git are now applied to Harness.
Execute pipeline
In your Project, click Pipelines.
Click on your pipeline.
Harness loads your pipeline depending on where you saved your remote pipeline.
- If you saved your pipeline on the default branch, Harness loads it from the default branch.
- If you saved your pipeline on a non-default branch, Harness uses the metadata of this pipeline to load it from the non-default branch.
- If you saved your pipeline in a branch that is no longer available, Harness throws an error. You must select a branch to load your pipeline in this case.
Harness fetches your pipeline details from the default branch if you created your remote pipeline before version 77808. Select the corresponding branch and proceed to load a pipeline residing in a branch other than the default branch.
Click Run.

Click Run Pipeline.
Branch selection logic for fetching referenced entities in remote pipelines
The configurations of the required resources and any referenced entities like input sets and templates are fetched from Git during pipeline fetch, creation, or execution.
Following are the possible scenarios when your remote pipelines reference entities:
- The referenced entities are stored in the same repository as the pipeline.
- The referenced entities are stored in a different repository than the pipeline.
The referenced entities are stored in the same repository as the pipeline
Following are the key points to keep in mind when the referenced entities reside in the same repository:
- During pipeline execution, Harness fetches the entities like templates from the same branch as the pipeline. This lets you test the templates before merging them back into the "default" branch.
- Harness recommends creating a separate project for testing templates.
- Templates and the corresponding pipelines to test them must be in the same repository.
- When you modify a template in a feature branch, the test pipeline is also present in the feature branch.
- As you can execute the pipeline from any branch, you can select the branch in which the changes to test templates were pushed. Merge the changes after testing. Upon merging, others can access them.
- This approach works best when the teams responsible for creating and managing templates are different from those responsible for executing the pipeline (Platform Engineering or DevOps teams versus Developers), so the test projects should be separate from the production projects.
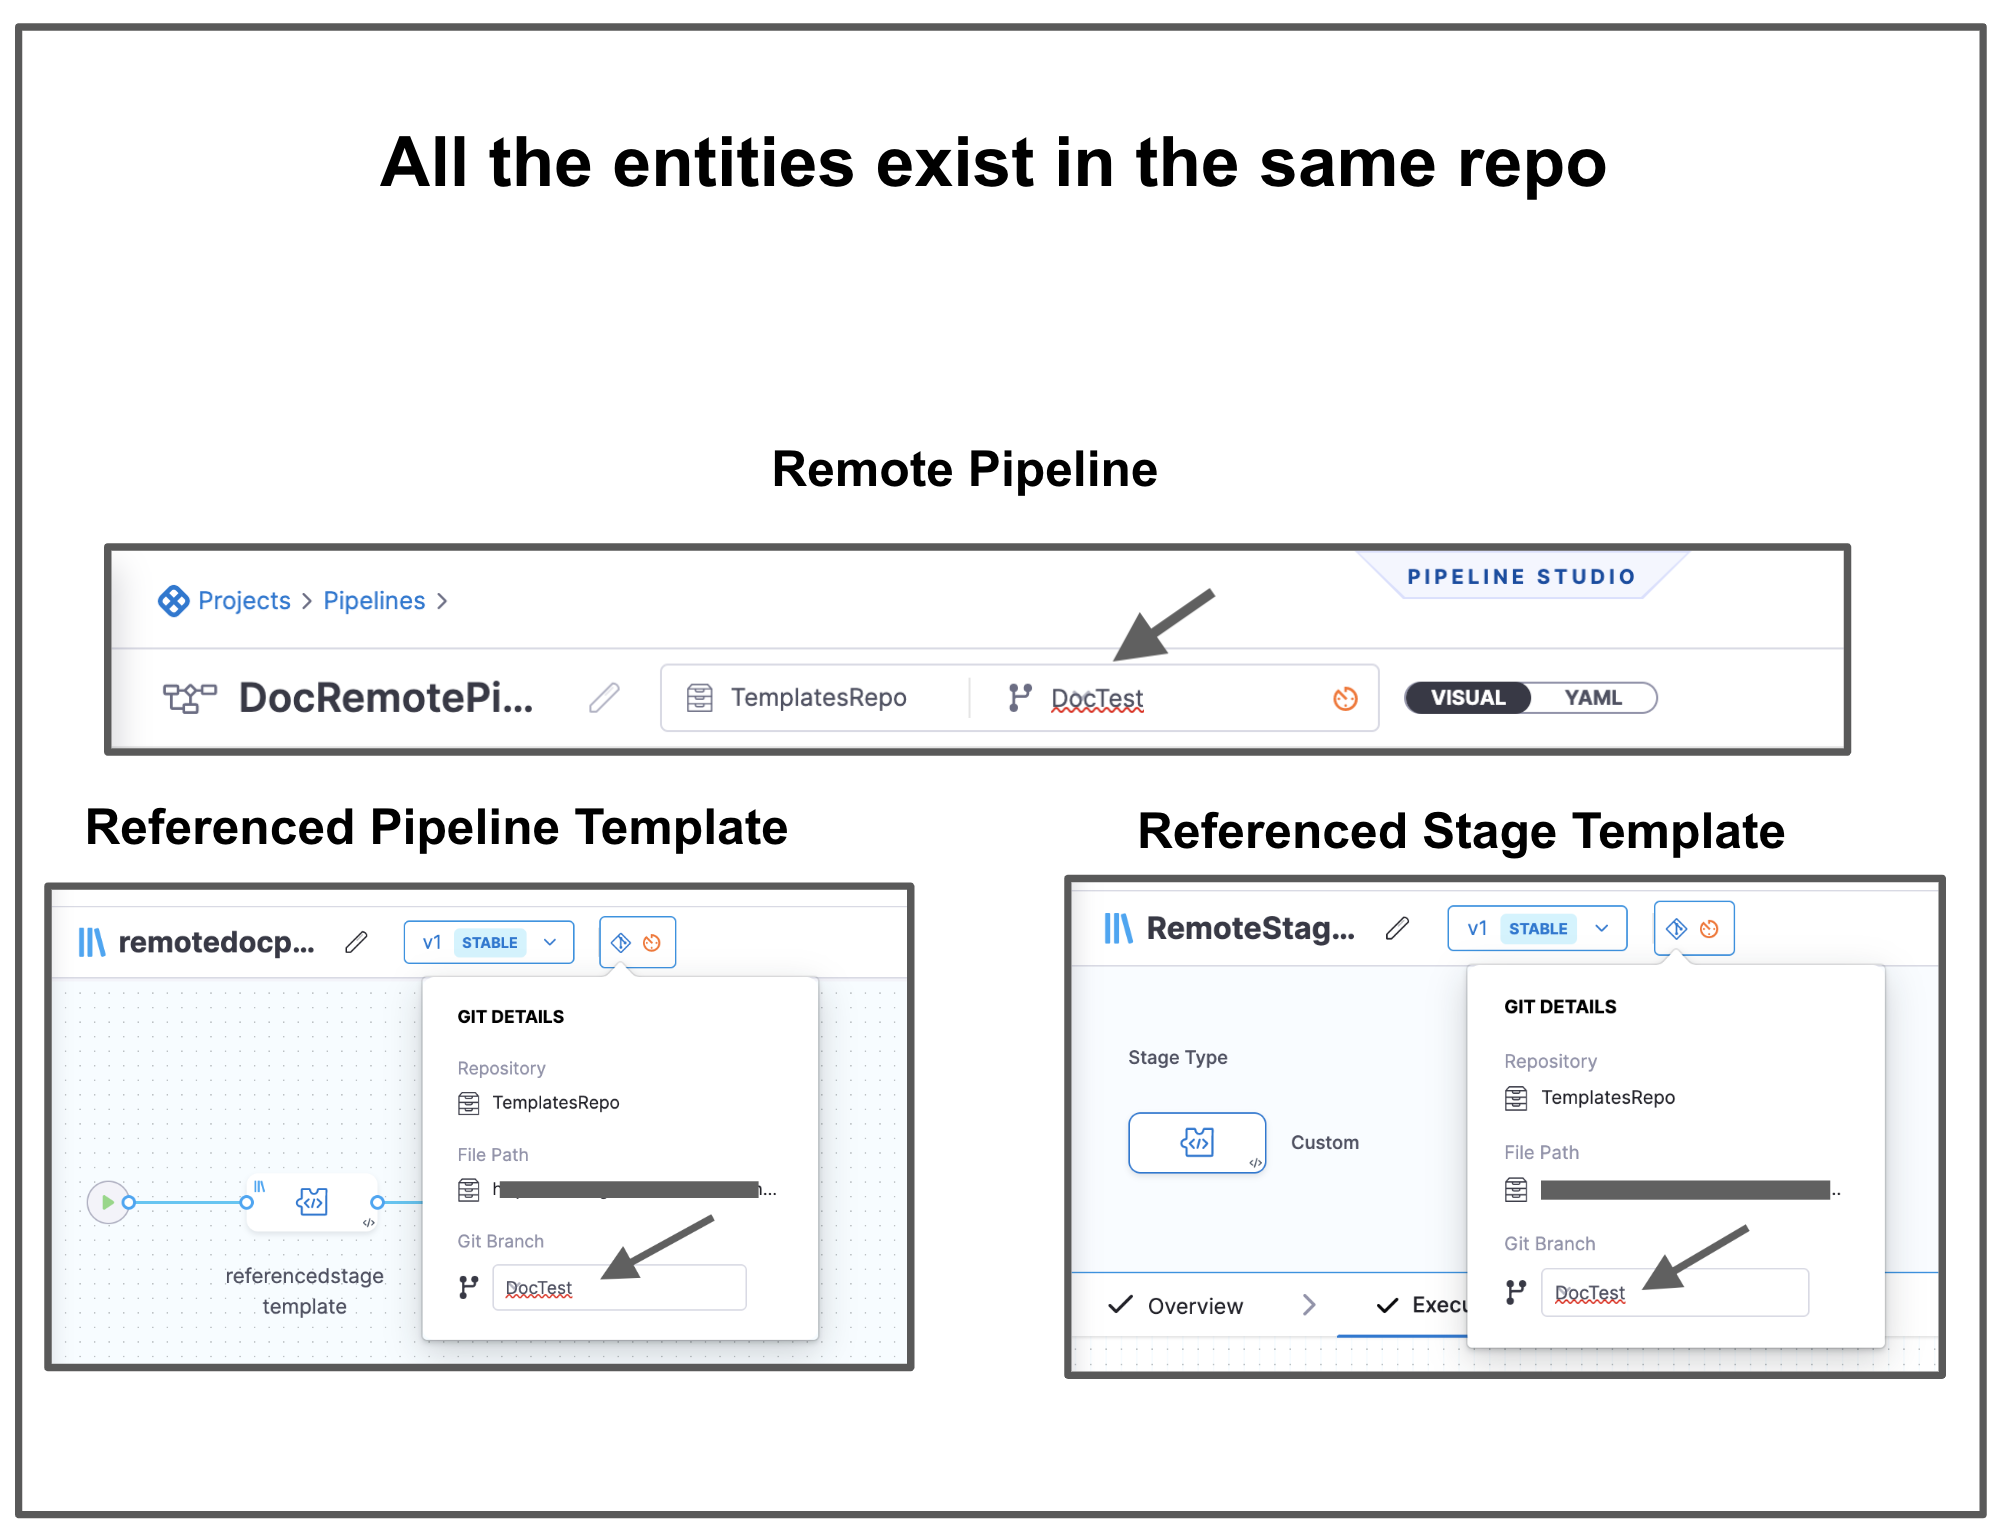
Let us look at an example:
There is a pipeline DocRemotePipeline that references a remote pipeline template named remotedocpipelinetemplate. This remote pipeline template references a remote stage template named RemoteStageTemplate. These 3 entities are in the same Git repo.
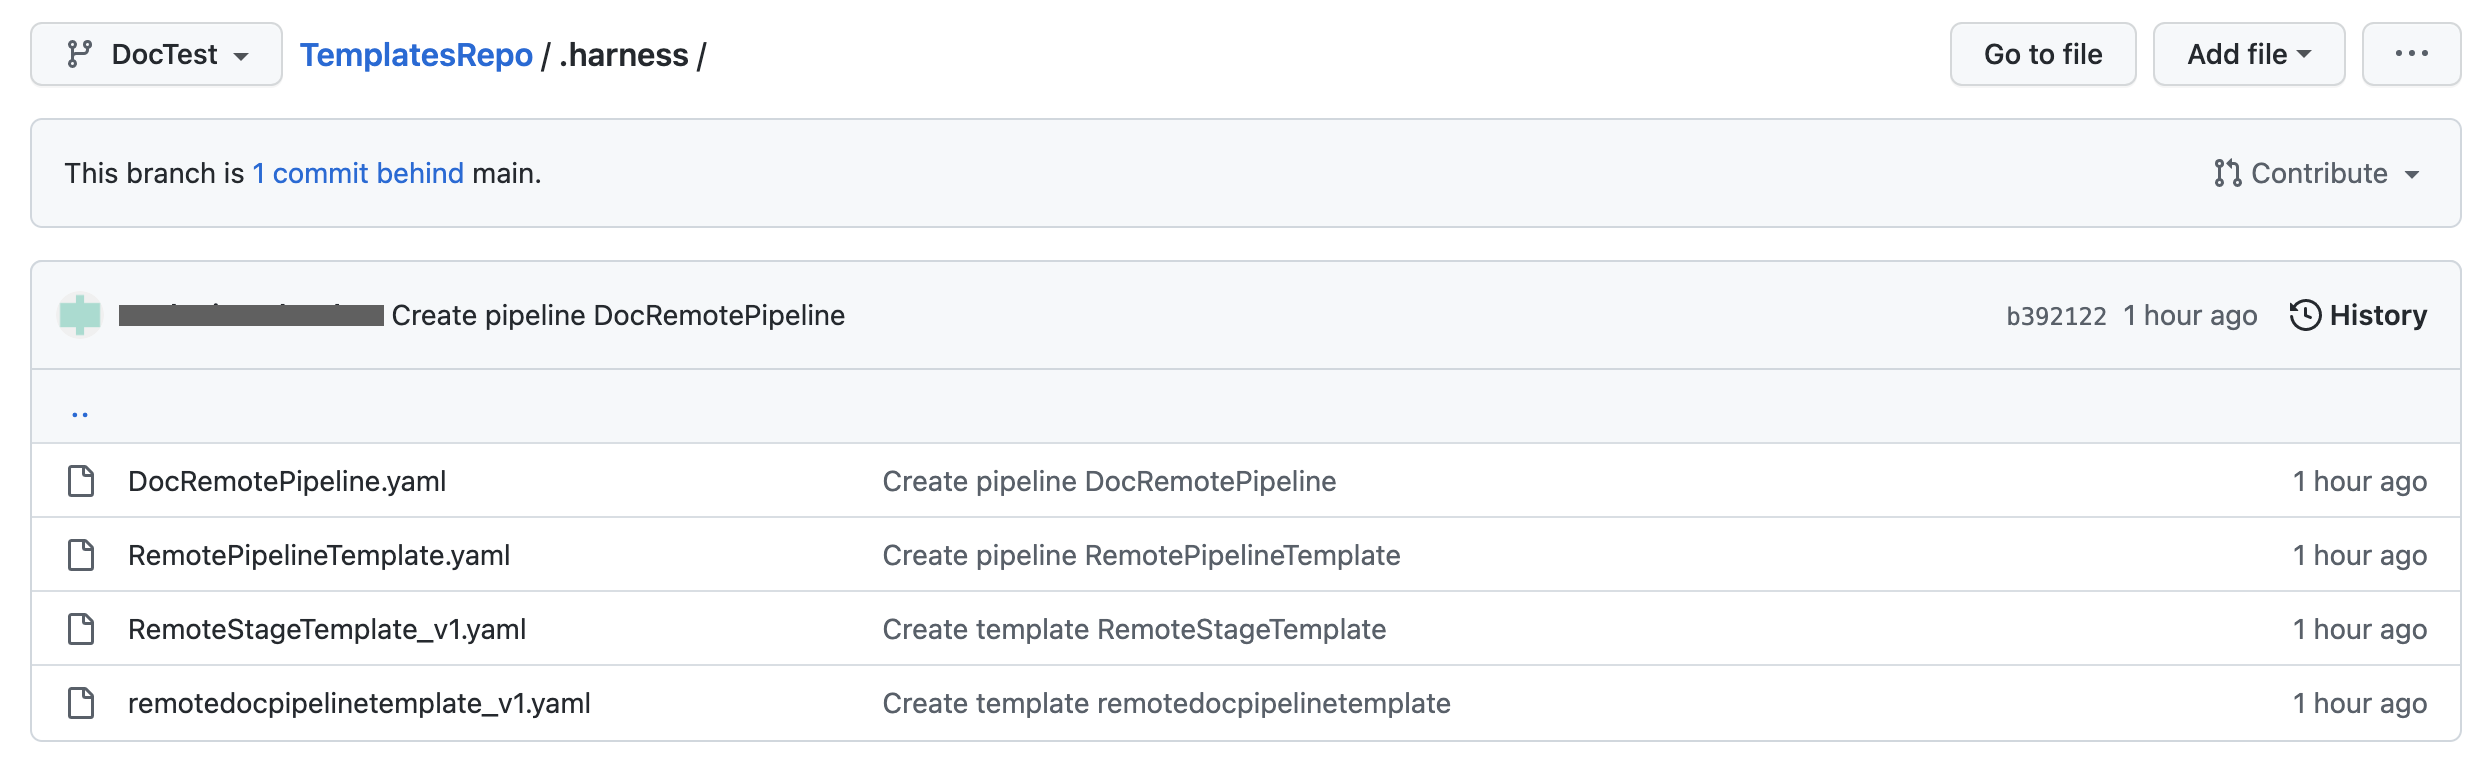
When you execute this pipeline, Harness fetches these entities from the branch that you have selected.
The referenced entities are stored in a different repository than the pipeline
Harness fetches entities like templates from the default branch of the repository if they are stored in another repository.
This ensures:
- Teams always use tested and approved templates.
- Prevents teams to execute pipelines using templates from different branches that have not yet been tested.
If your inline entities refer remote entities, Harness fetches the remote entities from the default branch.
Let us look at an example:
There is a pipeline remoteDocrepoPipeline that references a remote pipeline template named remotepipelinetemplate_docrepo. This remote pipeline template references a remote stage template named RemoteStageTemplate. These 3 entities are in different Git repos.
When you execute this pipeline, Harness fetches these nested entities from the default branch of the respective repositories.
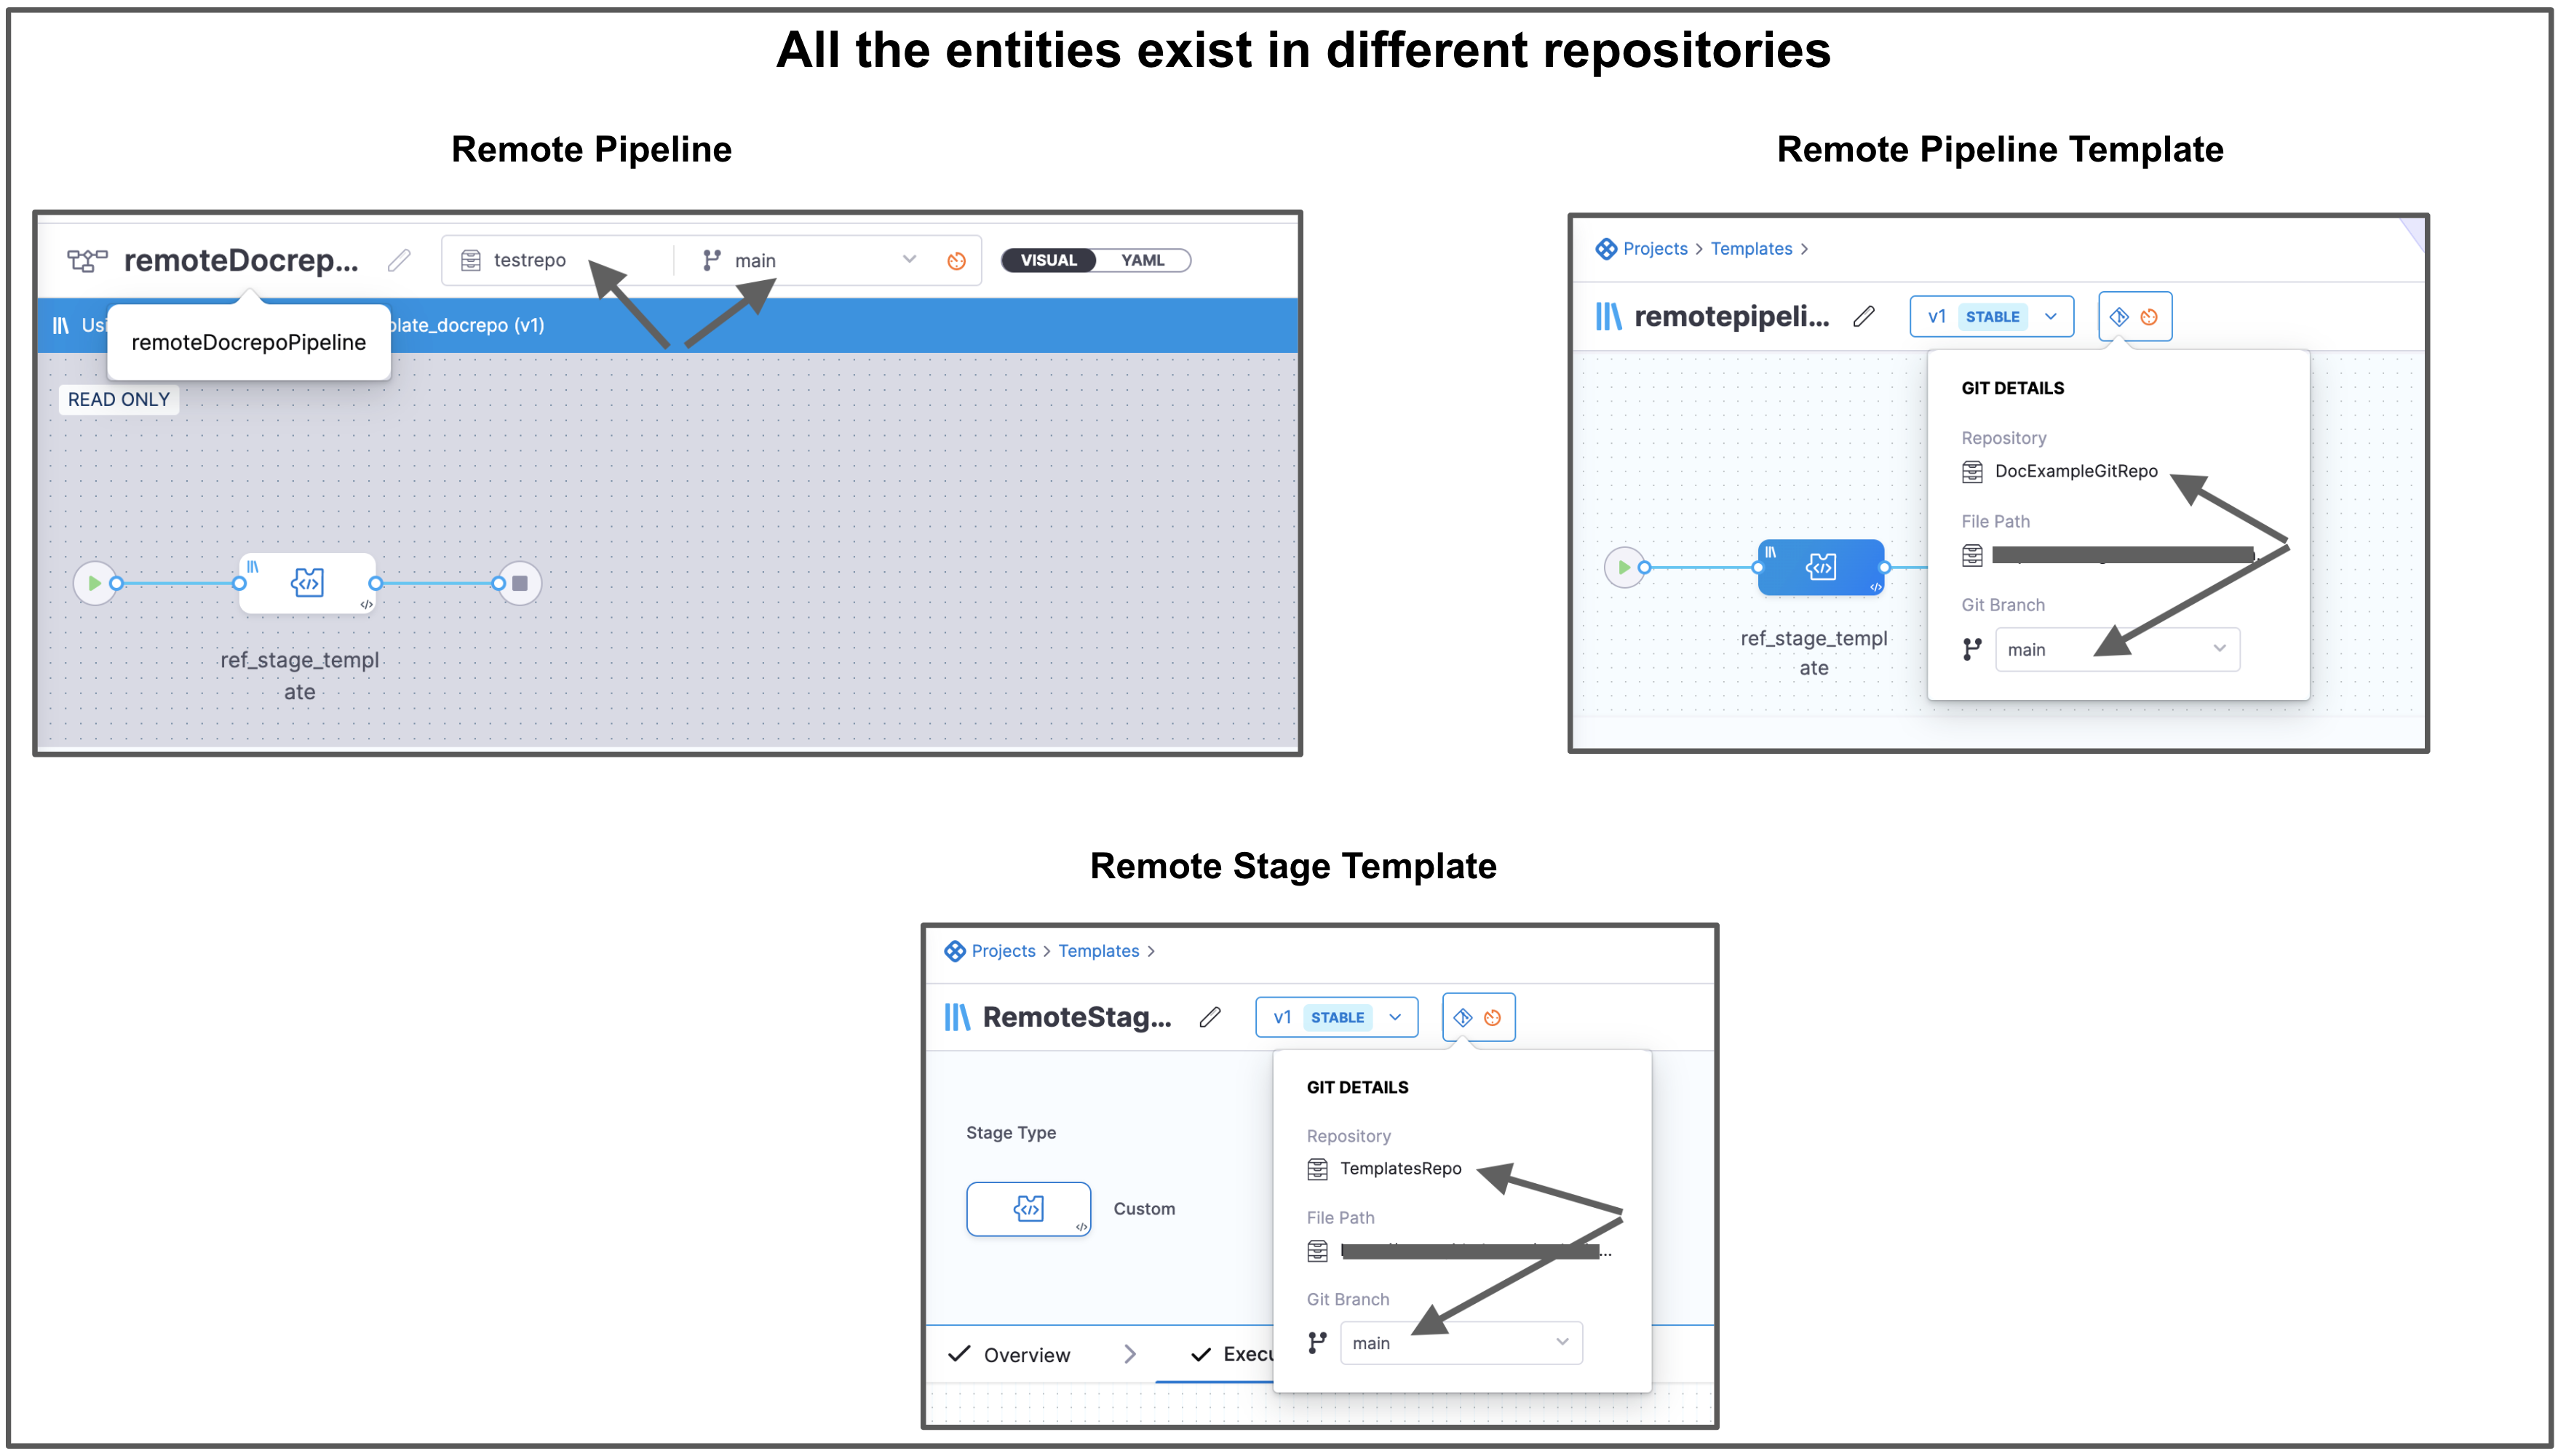
Harness resolves all the dependencies and then proceeds with Pipeline execution.