Schedule pipelines using triggers
You can schedule Pipeline executions using Cron-based Triggers.
For example, you can have a Pipeline run every Monday at 1AM. Harness will generate the Cron expression (0 1 * * MON).
For general Triggers reference, see Triggers Reference.
Before you begin
Step 1: Add a trigger to a pipeline
Open your Harness Pipeline in Pipeline Studio.
Click Triggers.
Click New Trigger.
Click Cron.
For Git-based Trigger types or CodeCommit, see Trigger Pipelines using Git Events.
In Trigger Overview, enter a name, description, and Tags for the Trigger.
Step 2: Schedule the trigger
In Schedule, use the settings to schedule the Trigger.
When you edit a Cron Trigger later, you can type or paste in a Cron expression.
The Cron expression will be evaluated against UTC time.
Here's a reminder of Cron expression formatting:
0 0 4 7 ? 2014
| | | |   | |
| | | |   | \------- YEAR (2014)
| | | |   \--------- DAY_OF_WEEK (NOT_SPECIFIED)
| | | \------------- MONTH (JULY)
| | \--------------- DAY_OF_MONTH (4th)
| \----------------- HOUR (0- MIDNIGHT LOCAL TIME)
\------------------- MINUTE (0)
Step 3: Set pipeline input
Pipelines often have Runtime Inputs like codebase branch names or artifact versions and tags.
Provide values for the inputs. You can also use Input Sets.
Click Create Trigger.
The Trigger is now added to the Triggers page.
Step 4: Enable or disable trigger
Use the Enable setting to turn the Trigger on and off.
 That's it. Your Pipeline will run when the Cron expression equals the current time.
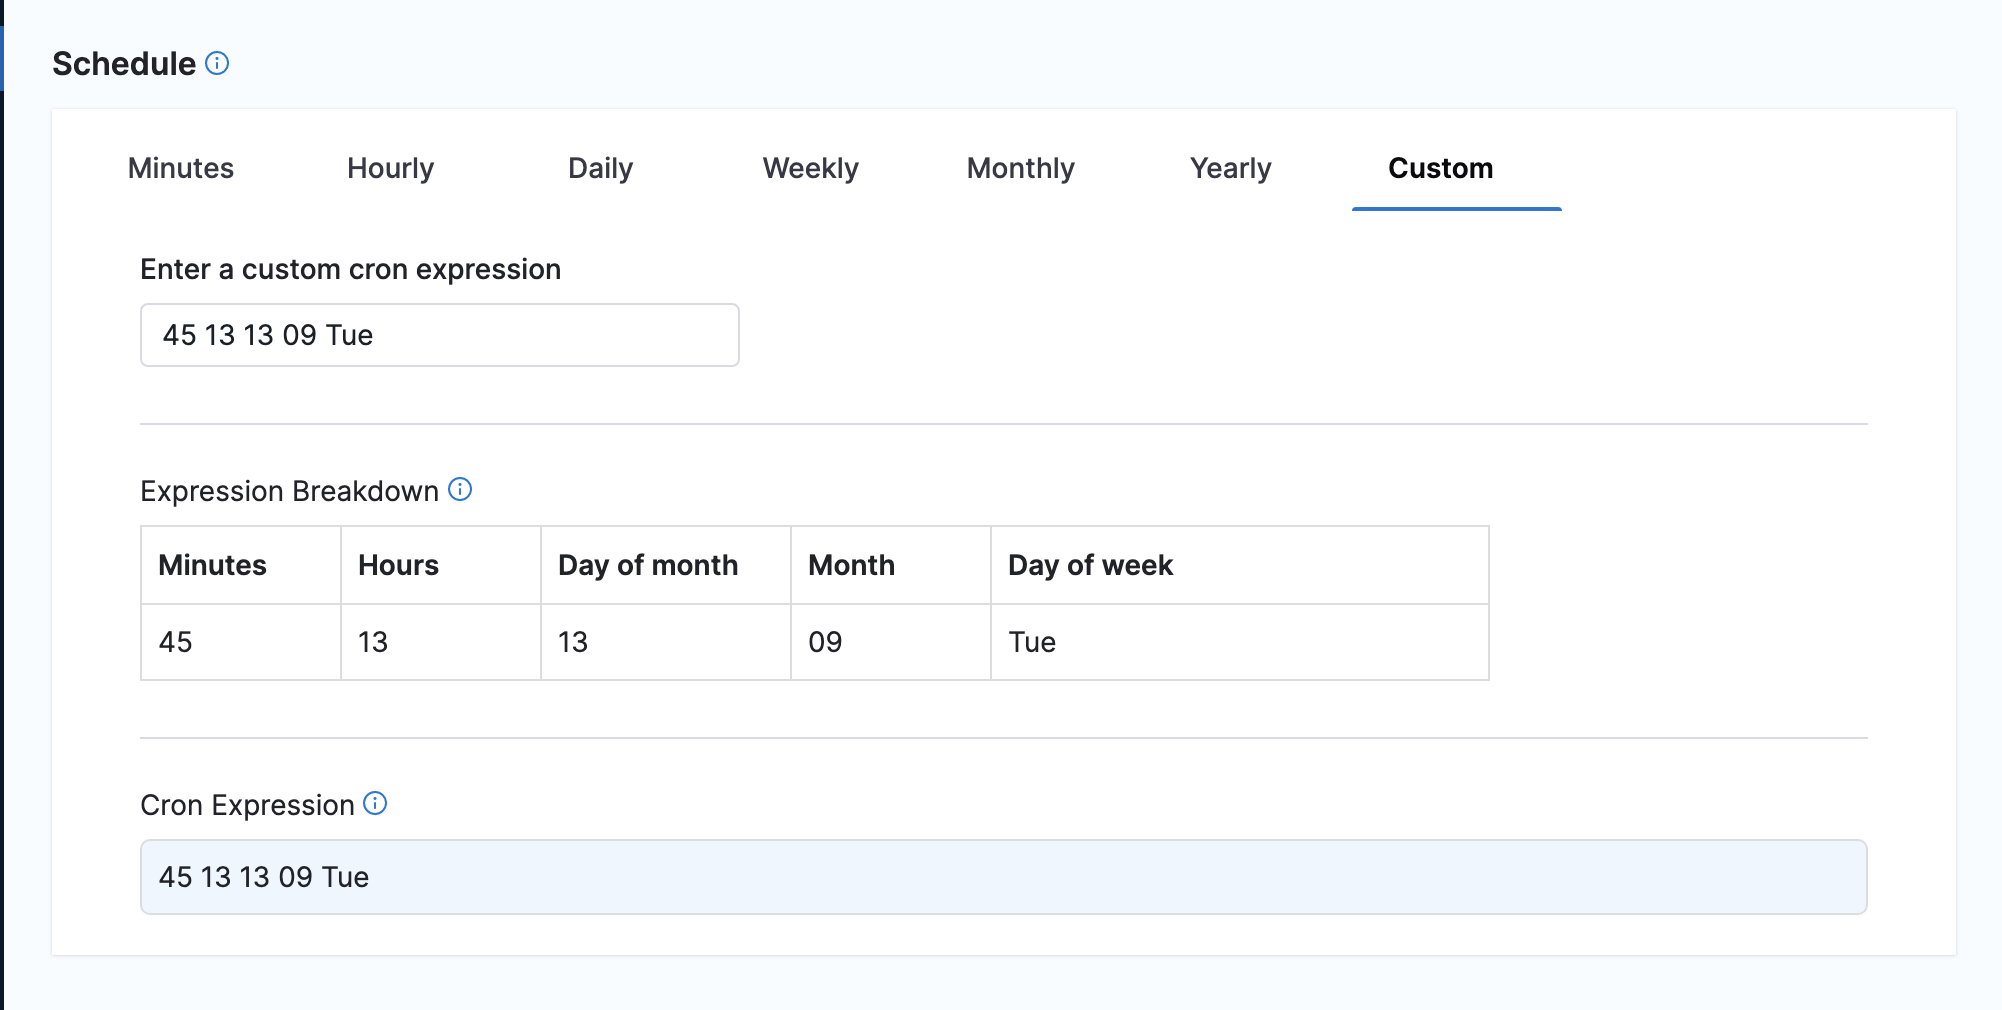
Option: Run once
To specify a run-once schedule, specify a fully qualified date and time.
Simply enter the time, day of month, month, and then allow for any day of the week.
The below example runs on At 1:45 PM, on day 13 of the month, and on Tuesday, only in September
45 13 13 09 Tue