Connect to a Git repository
Harness Code Repository Connectors connect your Harness account with your Git platform. Connectors are used to pull important files, such as Helm charts, Kubernetes manifests, and Terraform scripts.
Connect to Your Git Repositories
You can add a Code Repo Connector to the Account, Org, or Project scope. This topic will explain how to add it to the Project scope. The process is the same for Org and Account.
Important notes
Currently, this feature is behind the feature flag, OPTIMIZED_GIT_FETCH_FILES. Contact Harness Support to enable the feature.
Harness performs a git clone to fetch files. When fetching very large repositories, the network connection may time out.
Enable the feature flag, OPTIMIZED_GIT_FETCH_FILES to fetch very large repositories from Azure Repo. When this feature flag is enabled, Harness will use provider-specific APIs to improve performance.
If the OPTIMIZED_GIT_FETCH_FILES feature flag is enabled, and the GitHub organization has SAML enabled, the token must be SAML authorized to access the organization even if the repository is public. For more information, go to GitHub authentication with SAML single sign-on.
Permissions
In general, the Git provider user account you use to set up the Connector needs the same permissions it would need if you were working from Git.
So, if you are using the Harness Connector to pull manifests from a repo, the user account you use in the Connector must have a read repo permission for your Git provider.
For Harness Git Experience, see Source Code Manager Settings.
A public Git repo does not require a username and password/token. Harness does not validate public Git repo credentials.
Add a Git Repo
In most cases, you'll want to add a Connector for a popular Git provider like GitHub, described in Add a GitHub Connector. You can also add a platform-agnostic connection to a Git provider using Git Repo.
For more details on the settings to create this connector, see Git Connector Settings Reference.
In your Project select a module such as CD.
In Project Setup, click Connectors.
Click New Connector, and click Git in Code Repositories. The Git settings appear.
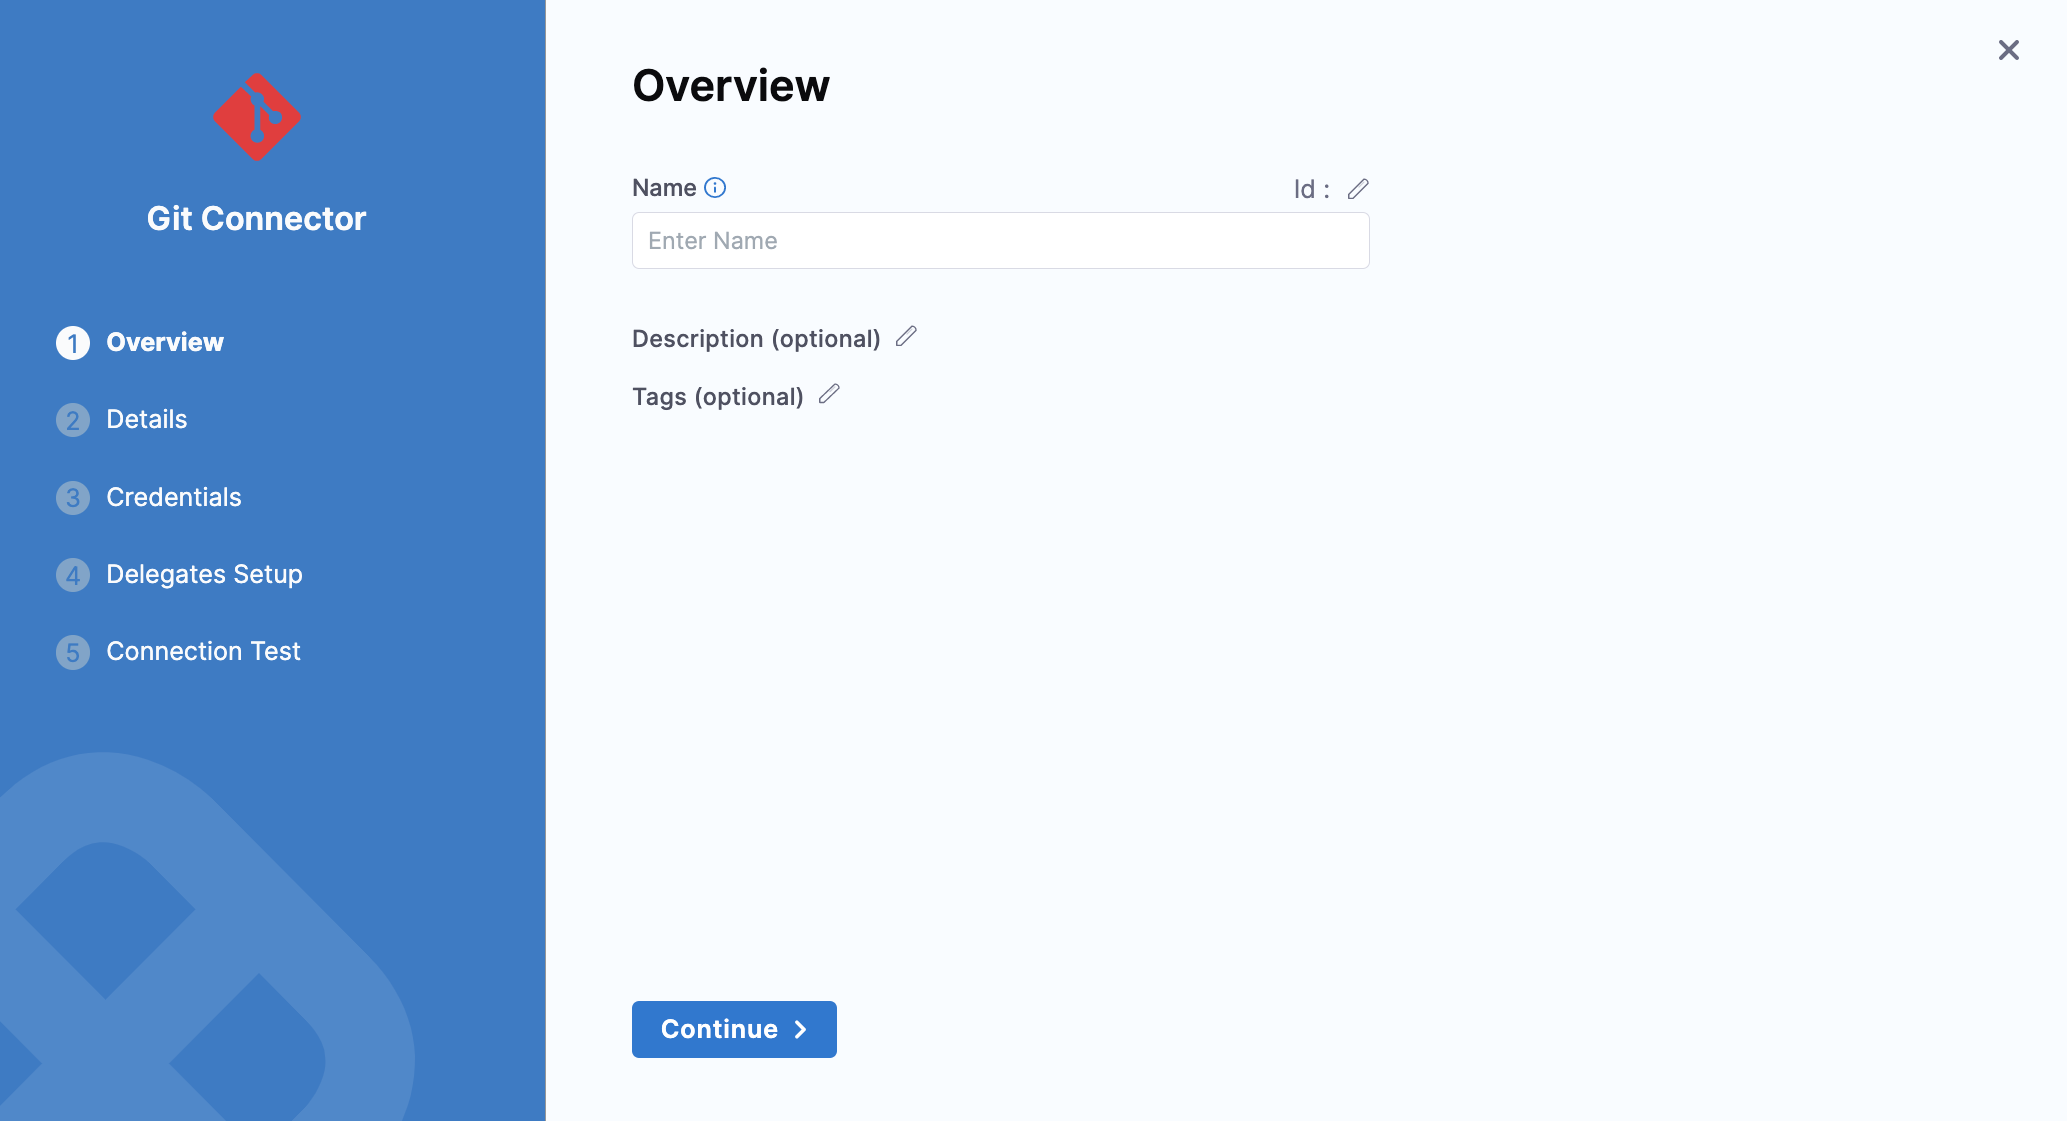
In Name, enter a name for this connector.
Select Account (which is an Organization) or Repository in URL Type.
Select Connection Type as HTTP or SSH. For more information, see Connection Type.
Enter the Git Account (org) or repo URL.
If you selected Account, in Test Repository, enter a repository name to test the connection.
Click Continue.
In Credentials, Enter your Username.
In Secret Key you can either create a new Encrypted Text or use an existing one.
Click Continue.
In Setup Delegates, you can choose Connect via any delegate or Connect only via delegates which has all of the following tags.
Click Save and Continue.
Once the Test Connection succeeds, click Finish. The Connector is listed in Connectors.
Add GitHub Repo
Add AWS CodeCommit Repo
For details on settings and permissions, see AWS CodeCommit Connector Settings Reference.
For steps on setting up the IAM user for CodeCommit connections, go to Setup for HTTPS users using Git credentials from AWS.
- Open a Harness Project.
- In Project Setup, click Connectors.
- Click New Connector, and click AWS CodeCommit in Code Repositories. The AWS CodeCommit settings appear.
- In Name, enter a name for this connector.
- Select Region or Repository.
- Region: Connect to an entire AWS region. This enables you to use one Connector for all repos in the region. If you select this, you must provide a repository name to test the connection.
- Repository: Connect to one repo.
- Enter the repository URL in AWS CodeCommit Repository URL. For example,
https://git-codecommit.us-west-2.amazonaws.com/v1/repos/doc-text.
You can get this URL from your CodeCommit repo by using its Clone URL menu and selecting Clone HTTPS. - Click Save and Continue.
- Enter IAM user's access key in Access Key.
- Enter the corresponding secret key in Secret Key. You can either create a new Encrypted Text or use an existing one.
- Click Save and Continue.
- Once the Test Connection succeeds, click Finish. The Connector is listed in Connectors.
Required Credentials
The IAM account you use to connect to CodeCommit must have the following policies:
- AWSCodeCommitPowerUser
- DescribeRegions
The DescribeRegions action is required for all AWS connections regardless of what AWS resource you are using with Harness.
For more details, go to Setup for HTTPS users using Git credentials from AWS and AWS managed policies for CodeCommit from AWS.
Connect to CodeCommit using the platform-agnostic Git Connector
You can also connect to CodeCommit using the Harness platform-agnostic Git Connector as opposed to the AWS CodeCommit Connector.
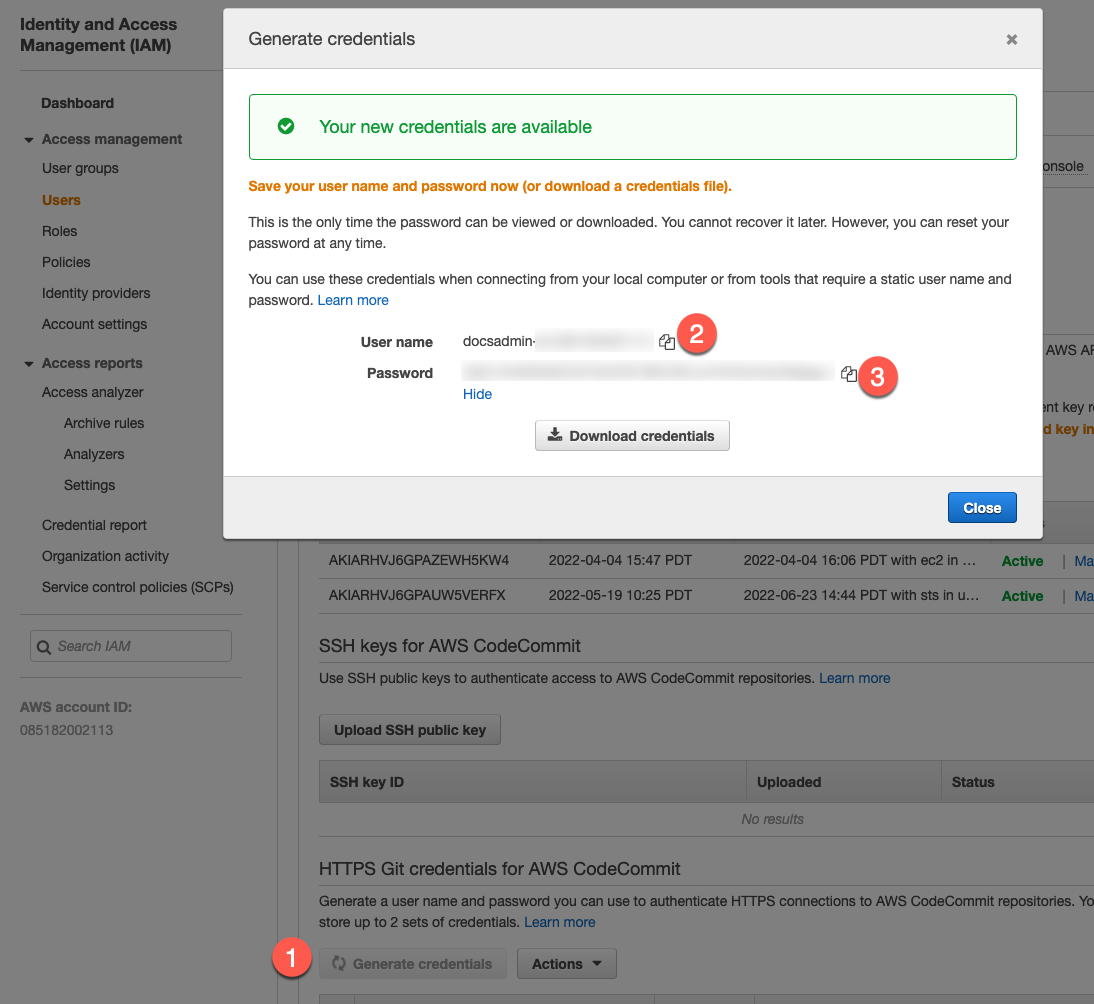
With the Git Connector, you use the IAM user's User Name and Password and not the Access Key and Secret Key.
In the IAM User you want to use, click Security credentials, and then generate credentials in HTTPS Git credentials for AWS CodeCommit.
In the Harness CodeCommit Connector, in Access Key, enter the User name from the IAM user credentials you generated.
In Secret Key, use a Harness Encrypted Text secret for the Password of the IAM user account.
Add a Bitbucket Repo
For more details on the settings to create this connector, see Bitbucket Connector Settings Reference.
Harness supports both Cloud and Data Center (On-Prem) versions of Bitbucket.
- Open a Harness Project.
- In Project Setup, click Connectors.
- Click New Connector, and click Bitbucket in Code Repositories. The Bitbucket settings appear.
- In Name, enter a name for this connector.
- Select Account or Repository in URL Type.
- Select Connection Type as HTTP or SSH. For more information, see Connection Type.
- Enter your Bitbucket Account URL.
For HTTP, the format for the URL should behttps://bitbucket.org/<userName>/<repoName>.git. - In Test Repository, enter your repository name to test the connection.
- Click Save and Continue.
- Enter your Username.
- In Secret Key you can either create a new Encrypted Text or use an existing one.
- Click Continue.
- In Setup Delegates, you can choose Connect via any delegate or Connect only via delegates which has all of the following tags.
- Click Save and Continue.
- Once the Test Connection succeeds, click Finish. The Connector is listed in Connectors.
Add GitLab Repo
For more details on the settings to create this connector, see GitLab Connector Settings Reference.
- Open a Harness Project.
- In Project Setup, click Connectors.
- Click New Connector, and click GitLab in Code Repositories. The GitLab Connector settings appear.
- In Name, enter a name for this connector.
- Select Account or Repository in URL Type.
- Select Connection Type as HTTP or SSH. For more information, see Connection Type.
- Enter your GitLab Account URL.
- In Test Repository, enter your repository name to test the connection.
- Click Continue.
- In Credentials, Enter your Username.
- In Secret Key you can either create a new Encrypted Text or use an existing one.
- Click Continue.
- In Setup Delegates, you can choose Connect via any delegate or Connect only via delegates which has all of the following tags.
- Click Save and Continue.
- Once the Test Connection succeeds, click Finish. The Connector is listed in Connectors.
Azure Repo
Azure Repos is a set of version control tools that you can use to manage your code. Azure Repos provide the following kinds of version control:
- Git: distributed version control
- Team Foundation Version Control (TFVC): centralized version control
For steps on connecting Harness to Azure Repo, go to Connect to Azure Repos.