Build a Feature Flag pipeline
A Feature Flag Pipeline enables you to combine a Feature Flag with other actions such as adding Jira issues, creating notifications, adding approvals, etc. You can:
- Use Jira issues to approve or reject a Pipeline or stage at any point in its execution
- Create notification rules to send notifications about the events on your Feature Flag Pipeline
- Schedule Pipeline executions using Cron-based Triggers, etc.
This topic explains how to build a Feature Flag Pipeline. Watch this video for an introduction:
Before you begin
You should be familiar with the Harness' Key Concepts and how to Create Organizations and Projects.
Create a Pipeline
This topic assumes you have a Harness Project set up. If not, go to Create Organizations and Projects to create one.
This topic shows you how to create a Pipeline from the Feature Flags module.
To do this, perform the following steps:
- Under Feature Flags, select an existing project or Create a new project.
- Once the project is selected or created, navigate to Pipelines and Create a Pipeline.
- In Name, enter a name for your Pipeline. An ID will be generated automatically.
- Enter Description and Tags for your Pipeline.
- Click Start. Now you're ready to add a Stage.
Add a Stage
A Stage is a subset of a pipeline that contains the logic to perform one major segment of the pipeline process.
Feature Flag pipeline is organized into stages. There has to be a minimum of one stage to run the Pipeline.
- Click Add Stage. This gives you two options to select stage types: Feature Flags and Approval.
- Approval Stage type approves or rejects a Pipeline at any point in its execution. Approvals are added in between stages to prevent pipeline execution from proceeding without an approval. You can use Harness UI, Jira, Custom Shell Script, or ServiceNow Approval mechanisms.
- To add Approval Stage, go to Manual Harness Approval Stages.
- To add a Feature Flag stage, select Feature Flags.
- In About your Stage, in Name, enter a name for your stage. Click Set up Stage.
You can add a name when you create the stage, but you can edit the name in the Overview section of the stage anytime.
Changing the stage name doesn't change the stage identifier (ID). The stage identifier is created when you first name the stage and it cannot be changed. For more information, go to Entity Identifier Reference.
You can add multiple Stages, and insert new Stages between the existing Stages. To add another stage to the Pipeline, in Pipeline Stages, click + and then follow the same steps.
Add a step
A step is a single task. Fundamentally, a step tells what to do at a particular point in time (or "step" in the process).
A Feature Flag pipeline involves a series of steps defined within a stage block. A stage can have one or many steps.
Overview
Once you've created a stage, you can see the name and ID in the Overview tab.
Apply a Rollout Strategy
With the Rollout Strategy, you can deploy multiple managed workloads. When a Rollout Strategy is applied, it is possible to make changes to only a limited user group as a risk mitigation strategy. By releasing production changes gradually, error rates or performance degradation can be tracked.
In the Rollout Strategy view, click Add Step.
Step Library Panel appears.
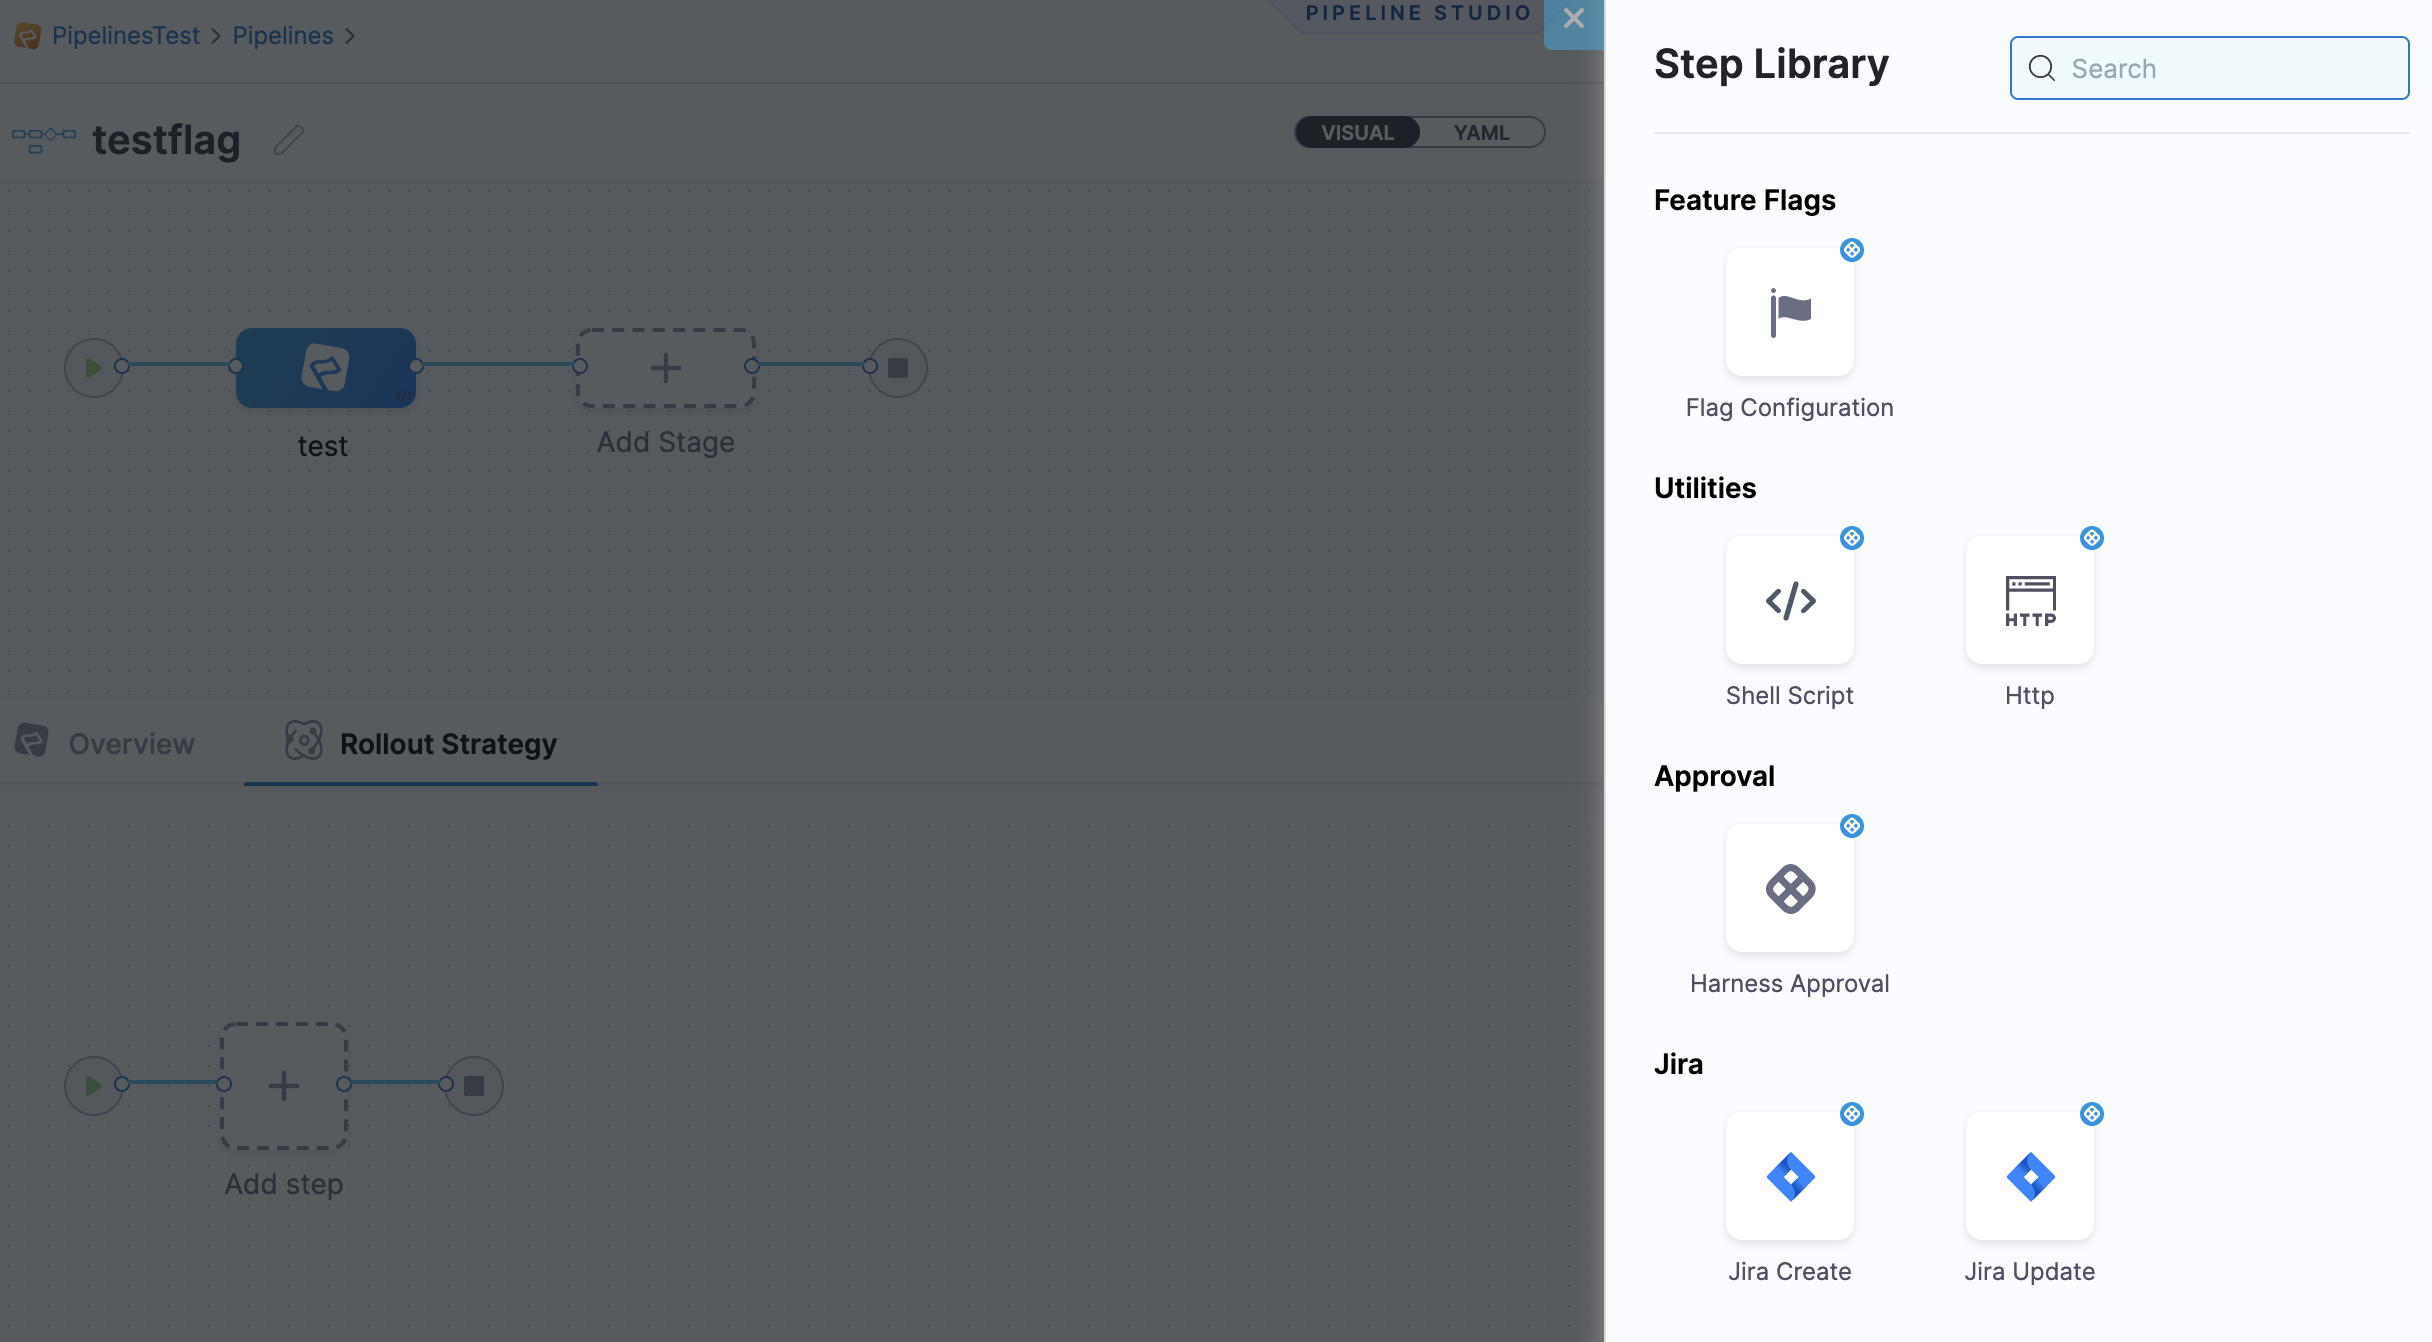
Add Feature Flag Configurations
Under Feature Flag Configuration, add Step Parameters:
- In Step Name, add a name for your step.
- In Environment, select the environment type from the dropdown menu.
- In Select Flag, there are two options- either you select a flag from the Fixed value or Select Runtime Inputs.
- Fixed values- Fixed Values are simply values that you enter manually when you configure a setting and do not change at runtime. These are settings you don't need to change based on some other step or runtime operation.
- Runtime Input- In the case of Runtime Inputs, you can set placeholders for values that will be provided when you start a pipeline execution.
When you run the Pipeline, give the inputs for flag type.
- In Flag Changes, there are various options available for configurations. You can set configurations and even delete them. The Configuration options available are- Set Flag Switch, Default Rules, Serve Variation to Individual Target.
- In Set Flag Switch, Select ON and OFF for the Flag switch.
- Define rules for the flag, Define the variation you want to see by default when the Flag is ON or OFF. Once you save the variations, a Flag is created for the Environment with these variations set as ON and OFF.
For example, if the flag isON, serve the variationTrue. If the flag isOFF, serve the variationFalse.
For more information, go to Manage Variations for Feature Flags. - Serve Variations to Target Group, Using default rules, you can specify to serve a specific variation, or apply a percentage rollout of a variation. For more information, go to Targeting Users with Flags.
- Serve Percentage Rollout, use Percentage Rollout to distribute users dynamically between variations. For more information, go to Percentage Rollout.
- Click Apply Changes.
- With this you finish making configuration changes in your flag. Now your pipeline is ready to be saved and run.
- Click Save.
Run the Pipeline
- In the pipeline view, click Run.
- The pipeline runs and a success message is generated.

View the results
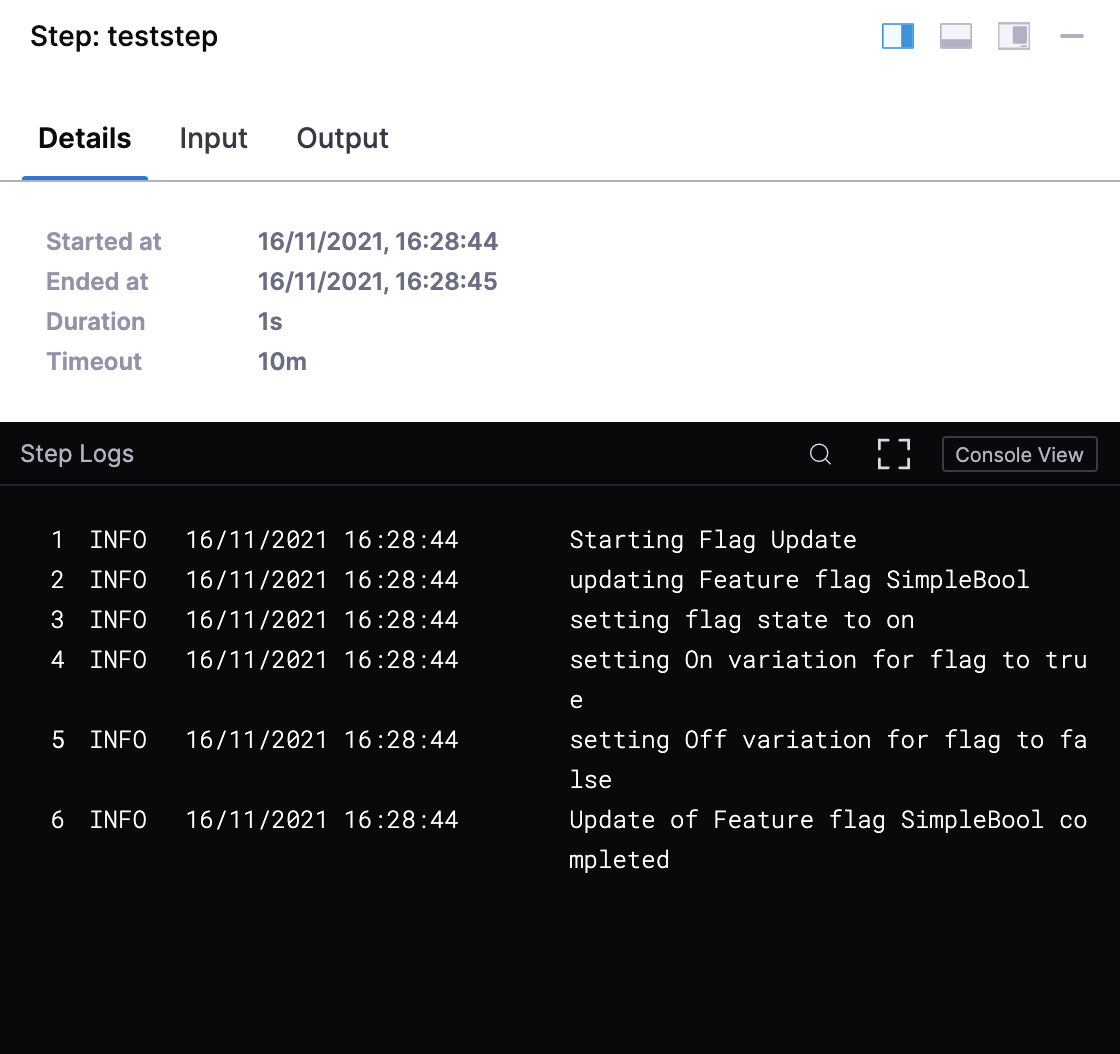
Click each stage's steps to see the logs in real-time. Click Console View to see more details.
Pipeline notification strategy
You can create notification rules to send notifications about the events on your Feature Flag Pipeline that are important to you. You can notify your User Group members using Slack, Microsoft Teams, Email, or PagerDuty as one of the notification channels. Event notifications are set up using Notification Rules.
Slack notification
You can notify your User Group members using Slack as one of the notification channels. You can add your User Group to a Notification Strategy and receive alert info in Slack.
For more information, go to Send Notifications using Slack.
Email notification
For email notifications, simply type in the email addresses that you want to notify.
For more information, go to Email notifications.
PagerDuty notification
For PagerDuty notifications, enter the key for a PagerDuty Account/Service to which Harness can send notifications.
For more information, go to Send Notifications using PagerDuty.
Microsoft Teams notification
Harness notifies your User Groups of events in pipelines and general alerts.
You can integrate your Harness User Group with Microsoft Teams and receive notifications in Teams channels.
For more information, go to Send Notifications using Microsoft Teams.
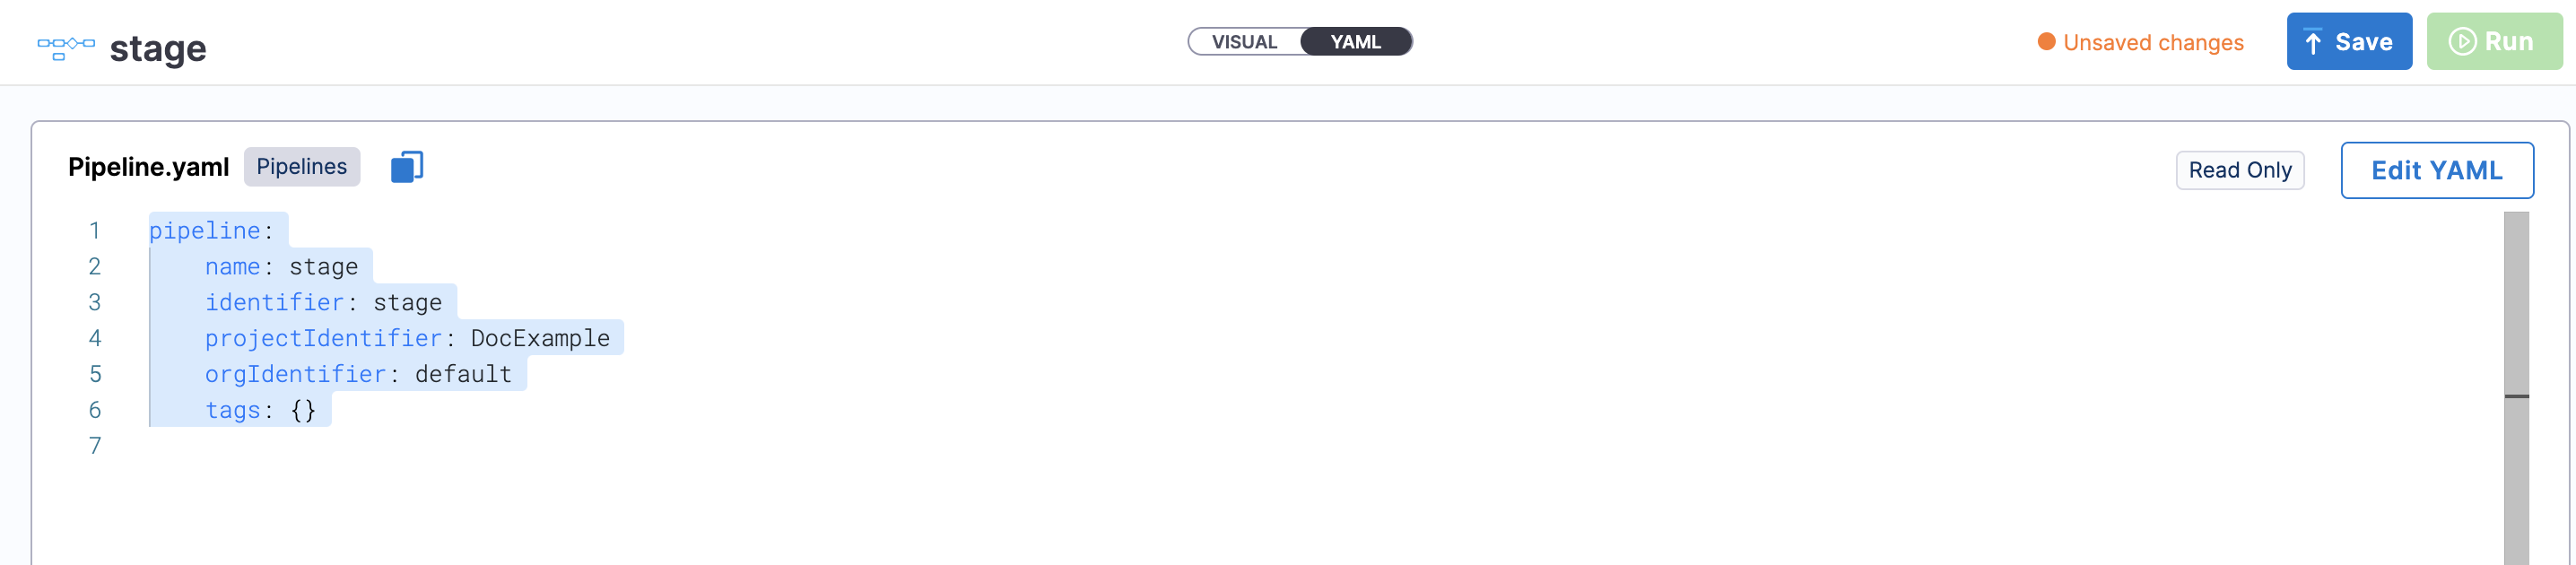
View a Pipeline using YAML
The entire Pipeline is available as YAML, also.
- In Feature Flag, in Pipelines, click YAML.
- You can see the entire Pipeline as YAML. You can edit anything in the Pipeline and run it again.
Schedule Pipelines using triggers
You can trigger Feature Flag Pipeline on a time schedule. You can select how often to execute the trigger by minute, hour, days, etc.
All the cron jobs are executed in Universal Time Coordinated (UTC). Cron triggers allow you to create Pipelines that start on a specific time schedule.
For more information, go to Schedule Pipeline using triggers.